How Yoga Poses Enhance Flexibility: A Comprehensive Guide

Introduction

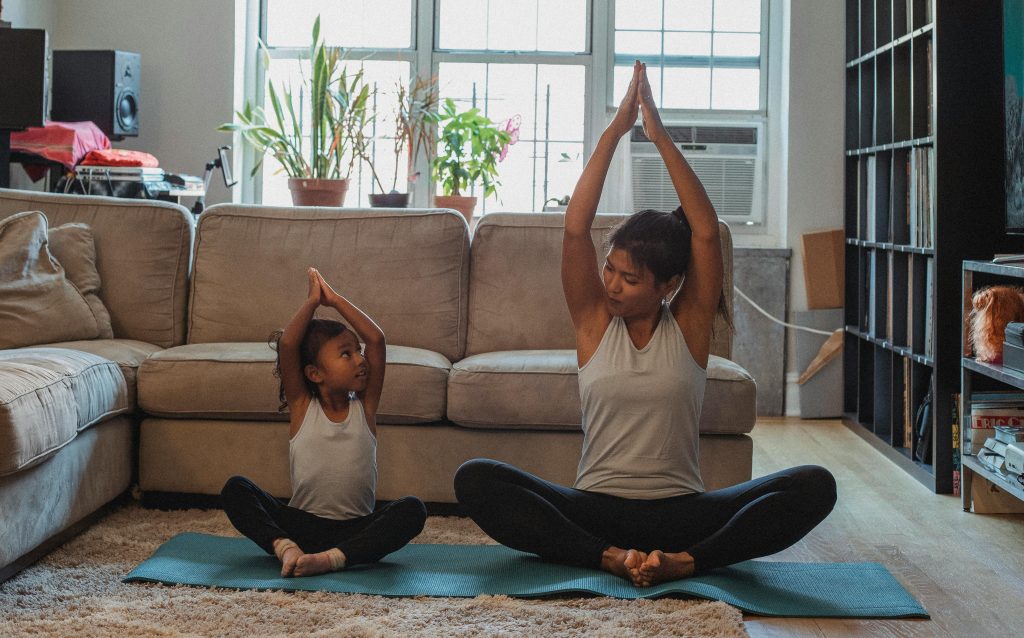
Flexibility isn’t just about touching your toes—it’s a cornerstone of overall physical health, injury prevention, and improved athletic performance. For many, tight muscles and stiff joints impede movement, causing discomfort and limiting daily activities. Yoga, with its blend of static stretches, dynamic transitions, and mindful breath work, offers a proven pathway to greater suppleness and range of motion. In this post, we’ll explore how specific yoga poses target key muscle groups, the physiological mechanisms behind improved flexibility, and practical strategies to integrate these postures into your routine safely. Whether you’re a seasoned yogi or a curious beginner, you’ll learn how to harness yoga’s transformative power to unlock your body’s full potential.

Why Flexibility Matters

  • Enhanced mobility: Improved joint range of motion makes everyday tasks—tying shoelaces, reaching overhead, bending—easier and pain-free.
  • Injury prevention: Flexible muscles and connective tissues absorb stress more evenly, reducing the risk of strains, sprains, and overuse injuries.
  • Posture & alignment: Tight hip flexors, hamstrings, or chest muscles can pull your spine out of alignment; yoga counteracts these imbalances.
  • Mind–body connection: The mindful aspect of yoga encourages body awareness, helping you notice areas of tension and release them over time.

Analogy: Think of your body like a well-oiled machine—regular stretching through yoga keeps the “gears” running smoothly, preventing jams and breakdowns.

How Yoga Improves Flexibility: The Science

1. Muscle Lengthening Through Static Stretch

  • Mechanism: Holding a stretch for 30–60 seconds gradually changes the resting length of muscle fibers and connective tissue (the Golgi tendon organ response).
  • Benefit: Over time, muscles and tendons remodel at a longer length, allowing joints to move through a deeper range of motion.

2. Dynamic Mobility via Vinyasa Flows

  • Mechanism: Moving systematically through poses warms tissues, increases blood flow, and promotes synovial fluid production in joints.
  • Benefit: Dynamic, active stretches teach neuromuscular coordination, helping muscles relax into length rather than resist it.

3. Neurological Adaptation and Relaxation

  • Mechanism: Yoga’s emphasis on breath and mindful focus shifts the nervous system from “fight-or-flight” (sympathetic) to “rest-and-digest” (parasympathetic), reducing protective muscle tension.
  • Benefit: Relaxed muscles stretch more easily, and your brain learns to override reflexive resistance to lengthening.

4. Fascia Release and Hydration

  • Mechanism: Deep stretches and gentle twists massage the fascia (connective tissue network), helping break up adhesions and improve tissue glide.
  • Benefit: Hydrated, pliable fascia supports greater overall flexibility and better force transmission between muscles.

Key Yoga Poses for Flexibility

H2: Hip-Opening Poses

1. Pigeon Pose (Eka Pada Rajakapotasana)

  • Targets: Hip rotators (piriformis), glutes, hip flexors
  • How to practice:
    1. From Downward-Facing Dog, bring your right knee forward toward your right wrist.
    2. Extend your left leg straight back, keeping hips square.
    3. Fold forward, resting on forearms or forehead, and breathe deeply for 5–10 breaths.

Tip: Place a block or folded blanket under the right hip if it doesn’t reach the floor to maintain proper alignment.

2. Garland Pose (Malasana)

  • Targets: Inner thighs, groin, lower back
  • How to practice:
    1. Squat with feet slightly wider than hip-width, toes pointing out.
    2. Bring palms together at heart center, press elbows into inner knees.
    3. Lengthen your spine, gently rocking side to side to deepen the stretch.

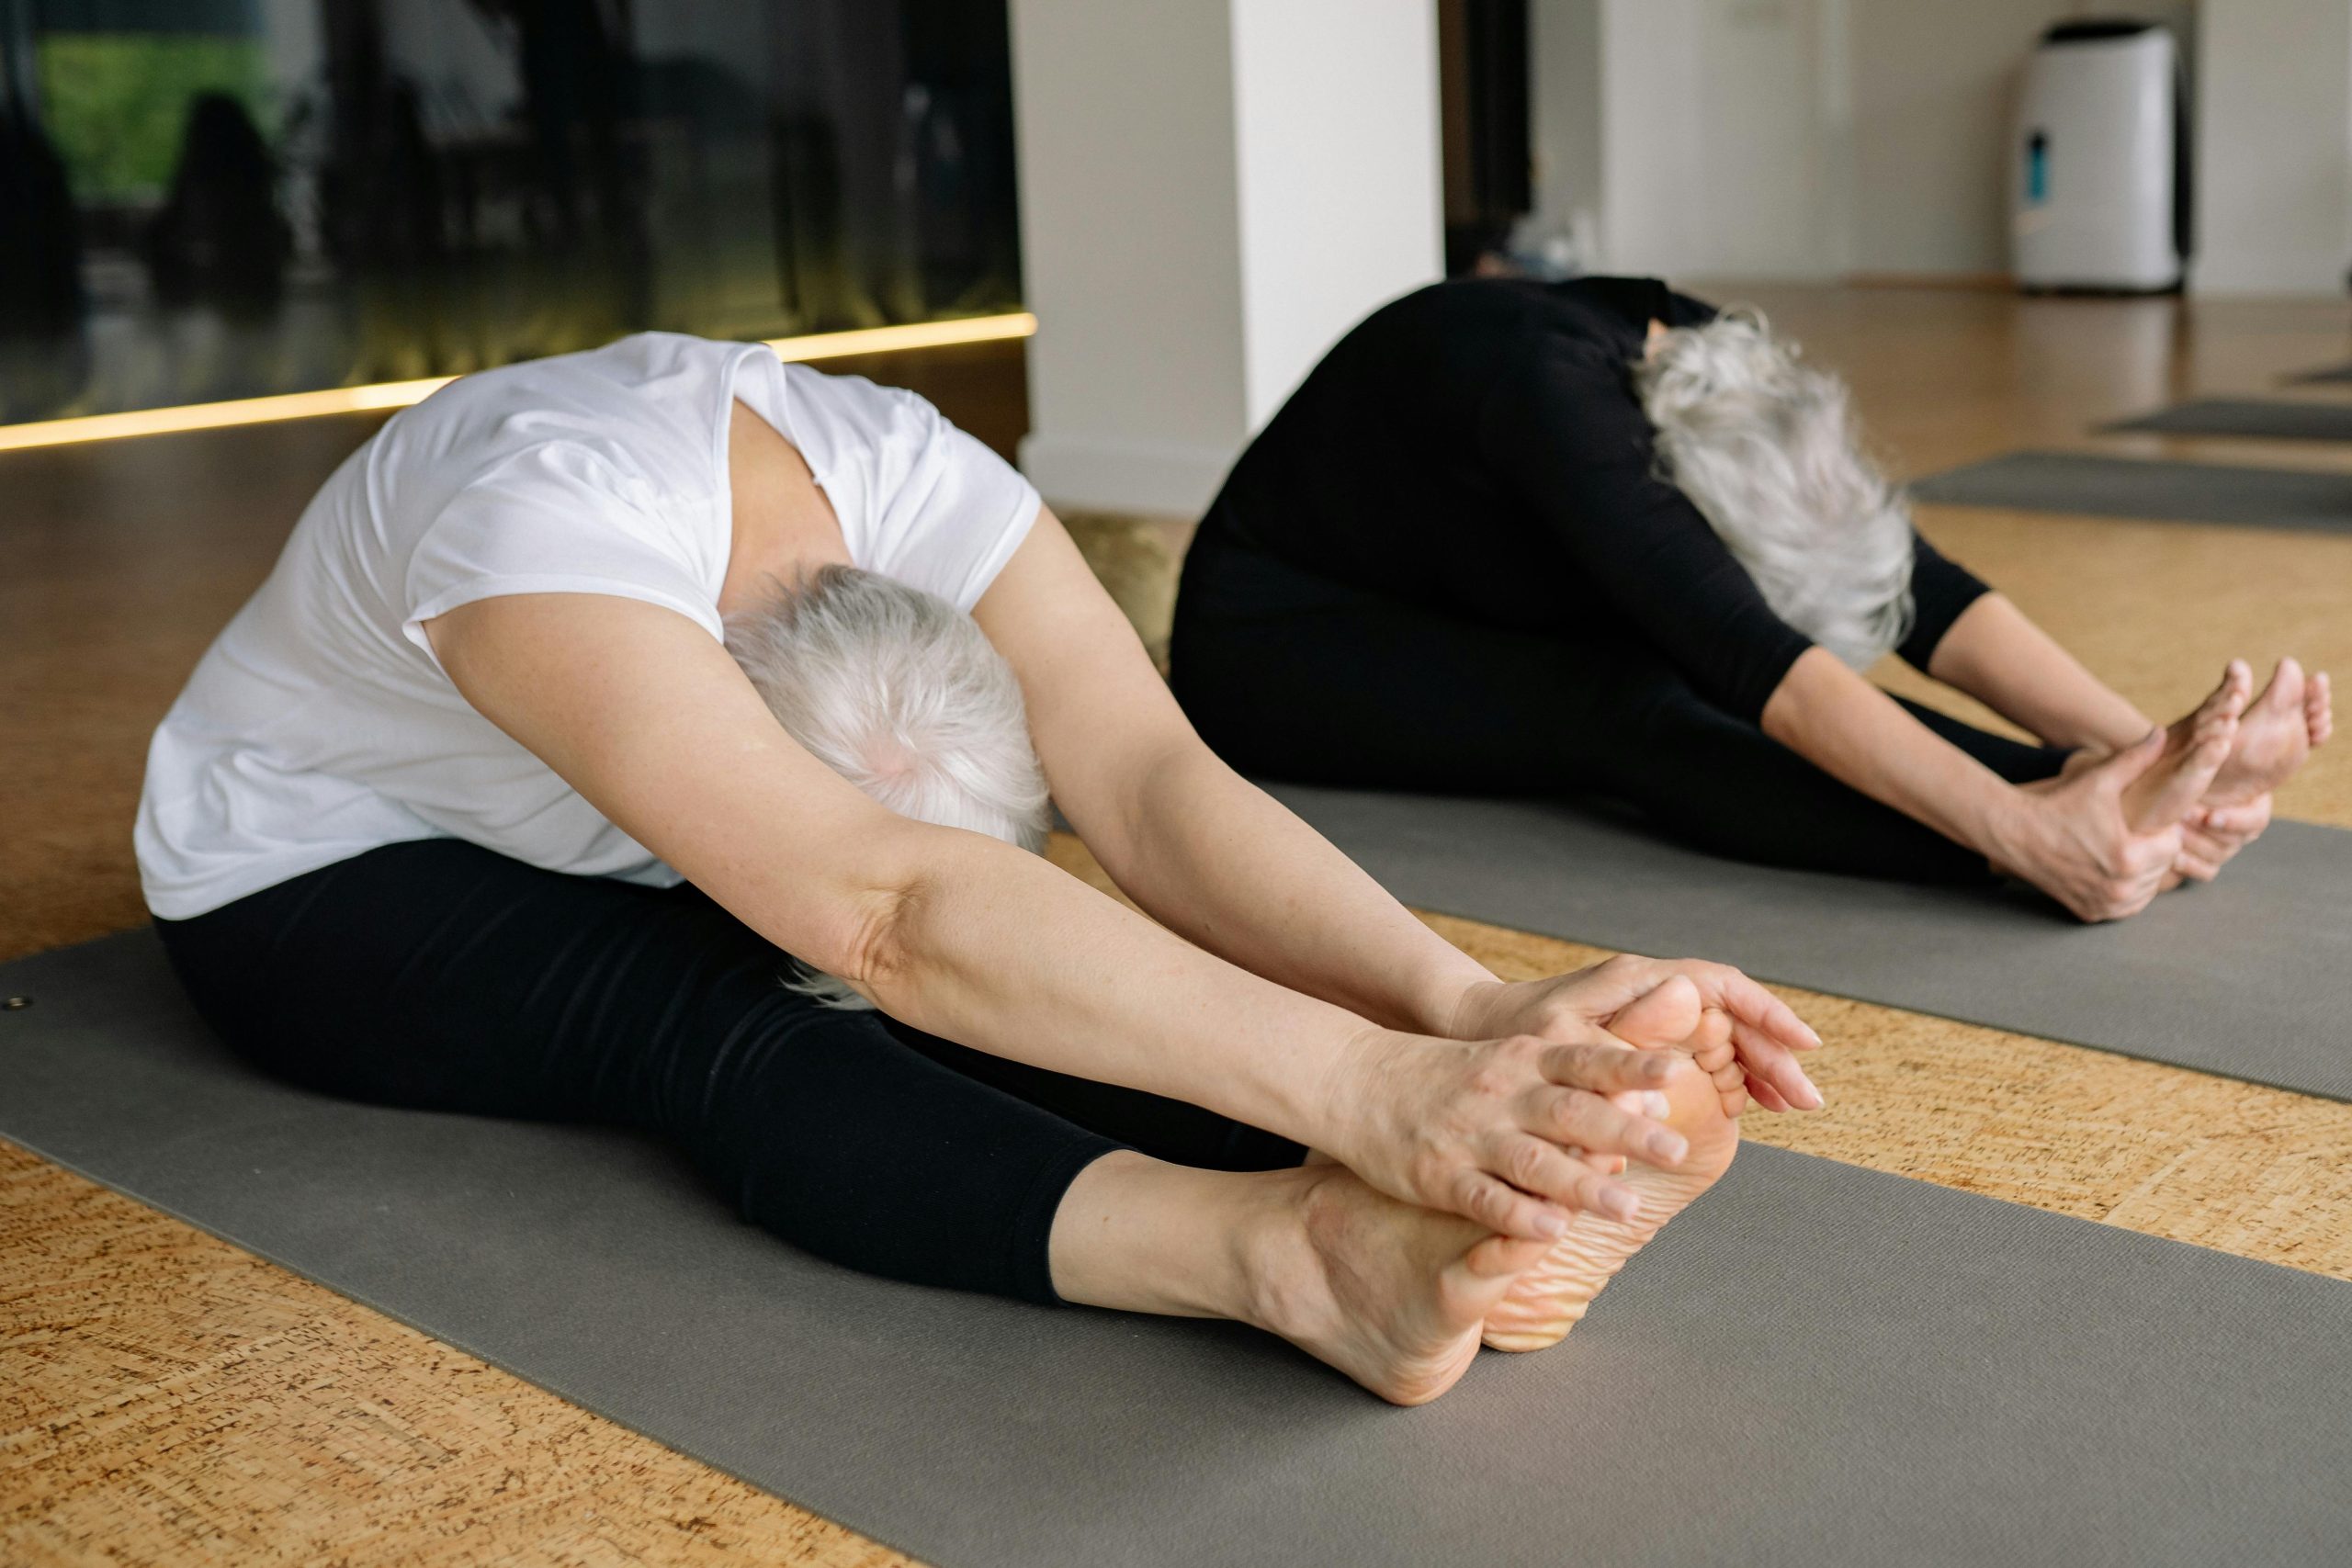
H2: Hamstring and Calf Stretches

3. Standing Forward Fold (Uttanasana)

  • Targets: Hamstrings, calves, lower back
  • How to practice:
    1. From standing, hinge at the hips and fold forward, bending knees slightly if needed.
    2. Let your head hang heavy; hold opposite elbows or reach for the floor/shins.
    3. With each exhale, soften into the stretch to gradually straighten legs.

Modification: Use blocks under your hands if you can’t reach the floor without rounding your back.

4. Runner’s Lunge with Forward Tilt

  • Targets: Hip flexors, hamstrings, calves
  • How to practice:
    1. From Downward Dog, step your right foot forward outside the right hand in a low lunge.
    2. Drop back onto the left knee, press hips forward, and then straighten the front leg for a hamstring stretch.
    3. Shift your torso back and forth to alternate between hip flexor and hamstring opening.

H2: Spine and Shoulder Flexibility

5. Cat–Cow Stretch (Marjaryasana–Bitilasana)

  • Targets: Spinal mobility, shoulders
  • How to practice:
    1. Begin on all fours with wrists under shoulders, knees under hips.
    2. Inhale, lift chest and tailbone (Cow); exhale, round spine and tuck tailbone (Cat).
    3. Flow for 1–2 minutes, synchronizing movement with breath.

6. Bridge Pose (Setu Bandha Sarvangasana)

  • Targets: Lower back, hip flexors, chest
  • How to practice:
    1. Lie on your back with knees bent, feet hip-width apart.
    2. Press into feet and lift hips toward the ceiling.
    3. Interlace hands under your back or rest arms alongside body.
    4. Hold for 5–8 breaths, then release with control.

Structuring a Flexibility-Focused Yoga Practice

H2: Warm-Up: Awakening the Muscles

  • Start with gentle joint rotations (ankles, hips, shoulders).
  • Follow with Cat–Cow flows to mobilize the spine and awaken the core.

H2: Dynamic Sequence: Active Stretching

  • Sequence Example:
    1. Downward-Facing Dog → Runner’s Lunge (right) → Forward Fold → Runner’s Lunge (left) → Downward Dog.
    2. Repeat 3–5 rounds, linking breath to movement (inhale to lunge, exhale to fold).

H2: Deep Stretching: Static Holds

  • Incorporate 3–5 minutes of deep holds in Pigeon Pose (each side).
  • Add Garland Pose and Standing Forward Fold with longer holds (1–2 minutes each).

H2: Cool-Down and Savasana

  • Wind down with gentle supine twists and a supported Bridge or Reclined Bound Angle Pose (Supta Baddha Konasana).
  • Finish with at least 3–5 minutes in Savasana to integrate the practice and allow tissues to settle.

Tips for Safe and Effective Flexibility Gains

  1. Breathe consciously: Never hold your breath; exhalations help you release into stretches and calm the nervous system.
  2. Honor your edge: Stretch to the point of “comfortable tension,” not pain—mild discomfort is normal, sharp pain is a red flag.
  3. Consistency over intensity: A daily 10-minute routine trumps sporadic 60-minute sessions.
  4. Mindful progression: Track which poses feel tighter and revisit them regularly, gently increasing duration or depth.
  5. Rest and recovery: Allow 24–48 hours between intense flexibility sessions for muscle and fascia to remodel.

Expert Insight:
“Flexibility is as much neurological as it is structural. By combining mindful breath with progressive stretches, you teach both body and mind to let go of habitual tension patterns.”
— Dr. Anjali Patel, Physical Therapist and Yoga Instructor

Conclusion

Yoga offers a holistic, sustainable path to enhanced flexibility—combining the benefits of static stretching, dynamic movement, and mindful relaxation. By targeting key areas such as hips, hamstrings, spine, and shoulders through poses like Pigeon, Garland, and Bridge, you can unlock deeper ranges of motion and foster better posture, reduced pain, and injury resilience. Structure your practice with a warm-up, dynamic flow, deep holds, and a restorative cool-down, and remember that breath, consistency, and respectful progression are your greatest allies. Step onto your mat today with curiosity and patience, and watch your body transform one mindful stretch at a time.

How Breathing Enhances Deep Stretching: Unlocking Your Flexibility Potential

Introduction

Breathing is often the unsung hero of effective stretching. While many of us focus on the position of our limbs or the depth of the stretch, the rhythm and control of our breath can make all the difference between a tense, shallow stretch and a deeply restorative one. In this post, we’ll explore the science behind breath-driven flexibility, share practical breathing techniques to deepen your stretches safely, and offer a sample routine to help you integrate mindful breathing into your daily practice. Whether you’re a seasoned yogi, an athlete looking to improve performance, or simply someone seeking greater mobility, understanding the role of breathing in deep stretching will elevate your practice—and help protect you from injury.

The Science Behind Breath and Muscle Function

The Physiology of Breathing and Muscle Relaxation

Deep, controlled breathing activates the parasympathetic nervous system—our body’s “rest-and-digest” mode. On inhalation, the diaphragm contracts and the rib cage expands; on exhalation, the diaphragm relaxes and the rib cage compresses. This rhythmic movement:

  • Lowers heart rate and blood pressure, signaling muscles to soften.
  • Reduces the stretch reflex, the body’s automatic protection against overstretching.
  • Enhances mind–body awareness, so you notice subtle muscle tensions and adjust accordingly.

Oxygen Delivery and Metabolic Clearance

Muscle fibers require oxygen to contract and recover. When you hold a stretch:

  • Oxygen demand rises in the targeted tissues.
  • Deep exhalation flushes out carbon dioxide and metabolic byproducts like lactic acid, reducing the “burn” and allowing you to go deeper more comfortably.
  • Consistent breathing maintains a balance between oxygen intake and waste removal, preventing cramps and improving recovery.

Breath Techniques for Enhancing Deep Stretching

Diaphragmatic (Belly) Breathing

What it is: Inhaling deeply so your belly expands, not just your chest.
How to practice:

  1. Lie on your back or sit upright.
  2. Place one hand on your chest, the other on your belly.
  3. Inhale through your nose, feeling your belly rise for 4 counts.
  4. Exhale through pursed lips for 6 counts, feeling your belly fall.
    Benefit: Maximizes lung capacity and engages core muscles for stability.

Box Breathing

What it is: A square-pattern breath popular among athletes and first responders.

  • Inhale for 4 seconds.
  • Hold for 4 seconds.
  • Exhale for 4 seconds.
  • Hold for 4 seconds.
    Benefit: Centers the mind, reduces stress, and primes muscles for controlled stretching.

The 3-5-7 Stretch Breath

A simple yet powerful pattern perfectly suited to deep stretching:

  1. Inhale for 3 seconds, filling the belly.
  2. Hold for 2 seconds (brief pause).
  3. Exhale for 5–7 seconds, easing deeper into the stretch.
  4. Repeat for 3–5 cycles in each position.
    Benefit: Extends the comfortable “window” of the stretch by emphasizing a long, controlled exhale.

Synchronizing Breath with Movement

Dynamic vs. Static Stretching

  • Dynamic stretching involves movement (e.g., leg swings). Sync your inhale as you prepare, exhale as you move into the position.
  • Static stretching holds a position. Use the 3-5-7 breath: sink deeper on the extended exhalation without bouncing.

Practical Tips for Breath–Movement Sync

  • Pre-Stretch Check: Before you enter a stretch, take two diaphragmatic breaths to calm your system.
  • Move on the Breath: Transition into each new angle on an inhale; settle in on the exhale.
  • Micro-Adjustments: If you hit resistance, pause and take three cleansing breaths, then see if you can find another millimeter of depth.
  • “Float” on Your Exhale: Imagine your body becoming as light as a balloon releasing air—softening as you let go.

Mind–Body Connection and Safety Considerations

Cultivating Mindfulness

Breath-focused stretching is inherently meditative. As you breathe:

  • Notice sensations—heat, mild discomfort, or ease.
  • Label thoughts—if your mind wanders, notice it without judgment and return to your breath.
  • Use a mantra like “breathe into the space” to reinforce focus.

Avoiding Overstretching and Injury

Breathing helps you recognize warning signs:

  • Sharp pain often comes with breath-holding—if you find yourself gasping or holding your breath, back off the stretch.
  • Dizziness or lightheadedness can mean you’re over-ventilating; slow your rhythm.
  • Uneven tension on one side signals asymmetry—use breath to explore balance and adjust posture.

Integrating Breath Work into Your Routine

Sample Deep Stretching Routine with Breath Cues

StretchDurationBreath Pattern
Child’s Pose1–2 minutes3-5-7 breath cycles
Seated Hamstring Stretch30 seconds per sideExhale to soften, inhale to reset
Pigeon Pose45 seconds per sideBox breathing (4-4-4-4)
Butterfly Stretch1 minuteDiaphragmatic breathing
Supine Spinal Twist30 seconds per sideInhale to open, exhale to deepen

Tools and Apps to Support Your Practice

  • Breathwork Apps (e.g., Breathe2Relax, Prana Breath): guide timing and patterns.
  • Yoga Blocks and Straps: help you find and maintain position so you can focus on breath.
  • Wearable Biofeedback Devices: some trackers monitor heart-rate variability as a proxy for parasympathetic activation.

Conclusion

Breathing is more than a background process—it’s the key that unlocks deeper, safer, and more effective stretches. By activating the parasympathetic nervous system, enhancing oxygen delivery, and grounding the mind, controlled breath transforms your practice from a mere physical routine into a holistic, restorative experience. Start by exploring diaphragmatic and box-breathing techniques, then integrate patterns like the 3-5-7 stretch breath. With mindful breath and movement synchronization, you’ll not only improve flexibility but also cultivate a calmer, more focused state of mind—on and off the mat.

Simple Exercises to Improve Shoulder Mobility

Introduction

Shoulder mobility is essential for everyday life—reaching overhead cabinets, lifting groceries, or maintaining good posture at your desk. Restricted shoulder movement can lead to pain, poor posture, and compensations in the neck, back, or other joints. The good news is that with consistent, targeted exercises, you can restore and enhance your range of motion. In this guide, you’ll learn why shoulder mobility matters, discover five straightforward exercises you can perform almost anywhere, and get expert tips on technique, frequency, and progression. Commit just 10–15 minutes a few times a week, and you’ll be on your way to freer, stronger shoulders.

Why Shoulder Mobility Matters

  • Injury Prevention: Tight shoulders force other muscles to compensate, increasing risk of strain.
  • Posture Support: Mobile shoulders help keep the spine neutral and the chest open, reducing slouching.
  • Enhanced Performance: From lifting weights to playing sports, greater range of motion improves form and power.
  • Daily Function: Tasks like dressing, grooming, and reaching overhead become easier and pain-free.

Common Causes of Restricted Mobility

  • Sedentary Lifestyle: Hours at a desk or driving lead to stiff, shortened chest muscles and inactive upper backs.
  • Muscle Imbalances: Overdeveloped chest and front shoulder muscles versus under-used mid-back muscles.
  • Scapular Dysfunction: Limited shoulder-blade movement restricts the entire shoulder joint.
  • Lack of Variety: Repetitive movements without stretching or counter-movements.

Five Exercises to Unlock Your Shoulders

Shoulder Dislocations (Pass-Throughs)

What You Need: A broomstick, PVC pipe, or resistance band.

  1. Grip the stick or band wider than shoulder-width in front of your hips.
  2. Keeping arms straight, raise it overhead and slowly bring it behind you.
  3. Reverse the motion back to the front.
  4. If it’s too challenging, widen your grip; as mobility improves, bring your hands closer together.

Benefits: Gently stretches the entire shoulder capsule and promotes scapular rotation.

Wall Slides

Setup: Stand with your back, head, and arms (elbows bent at 90°) pressed against a wall.

  1. Press forearms and the backs of your hands into the wall.
  2. Slide your arms straight up as far as you can while maintaining contact.
  3. Lower them back down under control.
  4. If you can’t keep full contact, perform the movement seated or focus on the same motion without the wall.

Benefits: Encourages thoracic extension, activates rotator cuff and serratus anterior for scapular stability.

Sleeper Stretch

Setup: Lie on your side with the bottom arm bent 90° in front of you.

  1. Use your top hand to gently press the bottom forearm toward the floor.
  2. You’ll feel a stretch in the back of the shoulder.
  3. Hold for 20–30 seconds, then switch sides.
  4. Only go as far as comfortable—sharp pain is a sign to back off.

Benefits: Targets internal rotation deficits and improves posterior capsule flexibility.

Doorway Pec Stretch

Setup: Stand in a doorway and place your forearms on each side of the frame at shoulder height.

  1. Lean forward gently until you feel a stretch across your chest and front shoulders.
  2. Hold for 30–45 seconds, breathing deeply.
  3. To target different fibers, raise your arms higher on the frame for a variation.

Benefits: Counteracts chest tightening from prolonged sitting and opens the front shoulder girdle.

Banded Scapular Retraction

What You Need: A light resistance band anchored at chest height.

  1. Hold the band with straight arms in front of you.
  2. Pull your elbows back, squeezing your shoulder blades together.
  3. Return slowly to the start position.
  4. Keep your spine neutral and avoid shrugging your shoulders up.

Benefits: Strengthens mid-traps and rhomboids, promoting balanced posture and healthy scapular movement.

Program Structure and Progression

  • Frequency: Aim for 3–4 sessions per week.
  • Volume: Start with 1–2 sets of 8–12 reps for each exercise.
  • Progression:
    • Increase to 2–3 sets as you improve.
    • Add holds at end-range (e.g., hold the top of a wall slide for 5 seconds).
    • Introduce single-arm or tempo variations for greater challenge.

Warm-Up: Spend 5 minutes on light cardio (arm circles, jogging in place) before starting.
Quality Over Quantity: Move slowly and control the motion—avoid bouncing.
Breathing: Exhale into each stretch or contraction, inhale as you release.

Integrating Mobility into Your Day

  • Desk Breaks: Perform doorway pec stretches or wall slides every hour.
  • Post-Workout Cool-Down: Use these drills after strength training to maintain flexibility.
  • Morning Routine: A quick mobility flow upon waking can alleviate overnight stiffness.

Client Success Story:
Alex, an office worker, struggled with shoulder tightness and neck pain. By doing wall slides and doorway stretches during his hourly breaks, he regained full overhead reach and reduced his neck tension by 70% in just three weeks.

Conclusion

Improving shoulder mobility doesn’t require complex equipment or long gym sessions. With five simple exercises—shoulder pass-throughs, wall slides, sleeper stretches, doorway pectoral stretches, and banded scapular retractions—you can significantly expand your range of motion, support healthy posture, and enhance overall function. Dedicate just 10–15 minutes, three to four times a week, focus on precise technique and breathing, and you’ll feel freer, stronger shoulders in a matter of weeks. Make these mobility drills part of your daily routine and enjoy the lasting benefits of resilient, pain-free shoulders.

Why Villas Are the Perfect Place to Unwind

Setting out on an outdoor adventure is a chance to fully engage with the wonders of nature, but being thoroughly prepared is crucial to handle any challenges that might come your way. This guide will walk you through the essential gear needed to ensure your next outdoor excursion is safe, comfortable, and enjoyable.

Your Essential Backpack

Your most vital piece of gear for any outdoor adventure is a dependable backpack. Seek out a pack that is sturdy, comfortable for long periods, and features adjustable straps and sufficient padding.

Choose a backpack with multiple compartments to keep your gear organized. Select the size of your backpack based on the duration and demands of your trip, ensuring it’s large enough to hold all your essentials without being too bulky.

Footwear That Supports

The right footwear can significantly impact your outdoor experience. Invest in high-quality hiking boots or trail shoes that offer excellent support, traction, and protection.

Look for features like waterproofing, breathable materials, and durable soles that grip different terrains. Break in your shoes before your trip to prevent blisters and discomfort. Pack extra socks to keep your feet dry and comfortable.

Confident Navigation

Navigating unfamiliar terrain is a vital skill, and having the right tools is essential. Bring a detailed map of your route, along with a compass or GPS device to keep you on track.

Familiarize yourself with your route beforehand, and be ready to adapt to changing conditions or unexpected obstacles. Consider carrying a handheld GPS device or a smartphone app with offline maps, particularly in remote areas where cell service might be unavailable.

First Aid Essentials

A well-stocked first aid kit is crucial for handling minor injuries and emergencies. Include bandages, antiseptic wipes, pain relievers, and any personal medications you might need.

Customize your kit based on your activities and the risks of your destination. Take a basic first aid course to learn essential skills like wound care, CPR, and treating common outdoor injuries.

Hydration is Key

Staying hydrated is critical for maintaining energy, focus, and overall well-being. Bring plenty of water, along with a hydration system like a water bladder or hydration pack for easy access.

Plan your water consumption carefully, especially in hot or humid conditions, and be prepared to purify water from natural sources using a portable filter or purification tablets. Monitor your hydration levels and drink water regularly to avoid dehydration.

Dress in Layers

Wearing layers is the key to staying comfortable and prepared for changing weather conditions. Opt for clothing made from moisture-wicking and breathable materials to stay dry and comfortable.

Pack a waterproof jacket, insulated layers, and accessories like a hat and gloves. Be ready to add or remove layers to regulate your body temperature. Invest in high-quality outdoor apparel designed for specific activities and environments, and always check the weather forecast before your trip.

Emergency Shelter

In case of unexpected weather changes or emergencies, a lightweight and portable emergency shelter is essential. Options include a compact tent, bivy sack, or emergency space blanket to provide shelter from the elements.

Choose a shelter that’s easy to set up and pack away quickly. Practice assembling it before your trip to ensure you can deploy it efficiently when needed. Bring additional supplies like a lightweight tarp or groundsheet to enhance your shelter’s comfort and effectiveness.

Embrace Preparedness

By equipping yourself with these essential pieces of gear and adopting a mindset of preparedness and caution, you’ll be ready to tackle any outdoor adventure with confidence. Prioritize safety, respect your surroundings, and leave no trace as you explore the great outdoors.

With the right gear and a spirit of adventure, the possibilities for exploration are endless. So pack your bags, lace up your boots, and get ready for your next unforgettable outdoor journey!

Ergonomic Essentials: Setting Up a Comfortable Office Workspace

Setting out on an outdoor adventure is a chance to fully engage with the wonders of nature, but being thoroughly prepared is crucial to handle any challenges that might come your way. This guide will walk you through the essential gear needed to ensure your next outdoor excursion is safe, comfortable, and enjoyable.

Your Essential Backpack

Your most vital piece of gear for any outdoor adventure is a dependable backpack. Seek out a pack that is sturdy, comfortable for long periods, and features adjustable straps and sufficient padding.

Choose a backpack with multiple compartments to keep your gear organized. Select the size of your backpack based on the duration and demands of your trip, ensuring it’s large enough to hold all your essentials without being too bulky.

Footwear That Supports

The right footwear can significantly impact your outdoor experience. Invest in high-quality hiking boots or trail shoes that offer excellent support, traction, and protection.

Look for features like waterproofing, breathable materials, and durable soles that grip different terrains. Break in your shoes before your trip to prevent blisters and discomfort. Pack extra socks to keep your feet dry and comfortable.

Confident Navigation

Navigating unfamiliar terrain is a vital skill, and having the right tools is essential. Bring a detailed map of your route, along with a compass or GPS device to keep you on track.

Familiarize yourself with your route beforehand, and be ready to adapt to changing conditions or unexpected obstacles. Consider carrying a handheld GPS device or a smartphone app with offline maps, particularly in remote areas where cell service might be unavailable.

First Aid Essentials

A well-stocked first aid kit is crucial for handling minor injuries and emergencies. Include bandages, antiseptic wipes, pain relievers, and any personal medications you might need.

Customize your kit based on your activities and the risks of your destination. Take a basic first aid course to learn essential skills like wound care, CPR, and treating common outdoor injuries.

Hydration is Key

Staying hydrated is critical for maintaining energy, focus, and overall well-being. Bring plenty of water, along with a hydration system like a water bladder or hydration pack for easy access.

Plan your water consumption carefully, especially in hot or humid conditions, and be prepared to purify water from natural sources using a portable filter or purification tablets. Monitor your hydration levels and drink water regularly to avoid dehydration.

Dress in Layers

Wearing layers is the key to staying comfortable and prepared for changing weather conditions. Opt for clothing made from moisture-wicking and breathable materials to stay dry and comfortable.

Pack a waterproof jacket, insulated layers, and accessories like a hat and gloves. Be ready to add or remove layers to regulate your body temperature. Invest in high-quality outdoor apparel designed for specific activities and environments, and always check the weather forecast before your trip.

Emergency Shelter

In case of unexpected weather changes or emergencies, a lightweight and portable emergency shelter is essential. Options include a compact tent, bivy sack, or emergency space blanket to provide shelter from the elements.

Choose a shelter that’s easy to set up and pack away quickly. Practice assembling it before your trip to ensure you can deploy it efficiently when needed. Bring additional supplies like a lightweight tarp or groundsheet to enhance your shelter’s comfort and effectiveness.

Embrace Preparedness

By equipping yourself with these essential pieces of gear and adopting a mindset of preparedness and caution, you’ll be ready to tackle any outdoor adventure with confidence. Prioritize safety, respect your surroundings, and leave no trace as you explore the great outdoors.

With the right gear and a spirit of adventure, the possibilities for exploration are endless. So pack your bags, lace up your boots, and get ready for your next unforgettable outdoor journey!

The World’s Most Impressive Feats of Design and Technology

Setting out on an outdoor adventure is a chance to fully engage with the wonders of nature, but being thoroughly prepared is crucial to handle any challenges that might come your way. This guide will walk you through the essential gear needed to ensure your next outdoor excursion is safe, comfortable, and enjoyable.

Your Essential Backpack

Your most vital piece of gear for any outdoor adventure is a dependable backpack. Seek out a pack that is sturdy, comfortable for long periods, and features adjustable straps and sufficient padding.

Choose a backpack with multiple compartments to keep your gear organized. Select the size of your backpack based on the duration and demands of your trip, ensuring it’s large enough to hold all your essentials without being too bulky.

Footwear That Supports

The right footwear can significantly impact your outdoor experience. Invest in high-quality hiking boots or trail shoes that offer excellent support, traction, and protection.

Look for features like waterproofing, breathable materials, and durable soles that grip different terrains. Break in your shoes before your trip to prevent blisters and discomfort. Pack extra socks to keep your feet dry and comfortable.

Confident Navigation

Navigating unfamiliar terrain is a vital skill, and having the right tools is essential. Bring a detailed map of your route, along with a compass or GPS device to keep you on track.

Familiarize yourself with your route beforehand, and be ready to adapt to changing conditions or unexpected obstacles. Consider carrying a handheld GPS device or a smartphone app with offline maps, particularly in remote areas where cell service might be unavailable.

First Aid Essentials

A well-stocked first aid kit is crucial for handling minor injuries and emergencies. Include bandages, antiseptic wipes, pain relievers, and any personal medications you might need.

Customize your kit based on your activities and the risks of your destination. Take a basic first aid course to learn essential skills like wound care, CPR, and treating common outdoor injuries.

Hydration is Key

Staying hydrated is critical for maintaining energy, focus, and overall well-being. Bring plenty of water, along with a hydration system like a water bladder or hydration pack for easy access.

Plan your water consumption carefully, especially in hot or humid conditions, and be prepared to purify water from natural sources using a portable filter or purification tablets. Monitor your hydration levels and drink water regularly to avoid dehydration.

Dress in Layers

Wearing layers is the key to staying comfortable and prepared for changing weather conditions. Opt for clothing made from moisture-wicking and breathable materials to stay dry and comfortable.

Pack a waterproof jacket, insulated layers, and accessories like a hat and gloves. Be ready to add or remove layers to regulate your body temperature. Invest in high-quality outdoor apparel designed for specific activities and environments, and always check the weather forecast before your trip.

Emergency Shelter

In case of unexpected weather changes or emergencies, a lightweight and portable emergency shelter is essential. Options include a compact tent, bivy sack, or emergency space blanket to provide shelter from the elements.

Choose a shelter that’s easy to set up and pack away quickly. Practice assembling it before your trip to ensure you can deploy it efficiently when needed. Bring additional supplies like a lightweight tarp or groundsheet to enhance your shelter’s comfort and effectiveness.

Embrace Preparedness

By equipping yourself with these essential pieces of gear and adopting a mindset of preparedness and caution, you’ll be ready to tackle any outdoor adventure with confidence. Prioritize safety, respect your surroundings, and leave no trace as you explore the great outdoors.

With the right gear and a spirit of adventure, the possibilities for exploration are endless. So pack your bags, lace up your boots, and get ready for your next unforgettable outdoor journey!