Archives 2025

Top Stretches for Desk-Bound Workers

Introduction

Sitting for extended periods strains necks, shoulders, backs, hips, and wrists. Regular stretching helps counteract poor posture, reduce discomfort, and boost circulation and focus. Below are the most effective stretches tailored for desk-bound professionals—no special equipment required. Perform each 2–3 times daily, holding for 20–30 seconds unless noted otherwise.

1. Neck Side Stretch

Targets: Upper trapezius, levator scapulae

  1. Sit tall with feet flat.
  2. Gently tilt your head to the right, bringing your ear toward your shoulder.
  3. Place your right hand lightly on the left side of your head to deepen the stretch.
  4. Keep left shoulder down.
  5. Hold 20–30s, then switch sides.

2. Chest Opener (Pectoral Stretch)

Targets: Pectoralis major/minor, anterior shoulder

  1. Stand or sit near the edge of your desk.
  2. Place forearms on desk edge with elbows at shoulder height.
  3. Step back until you feel a stretch across your chest.
  4. Keep spine neutral, avoid arching low back.
  5. Hold 20–30s.

3. Seated Spinal Twist

Targets: Thoracic and lumbar spine, glutes

  1. Sit sideways on your chair, right side to backrest.
  2. Grip the backrest with both hands and gently twist your torso to the right.
  3. Keep hips square and feet grounded.
  4. Hold 20–30s, then repeat on left.

4. Hip Flexor & Quad Stretch

Targets: Iliopsoas, quadriceps

  1. Stand and place your right foot on your chair behind you, knee bent.
  2. Shift weight forward into a lunge until you feel stretch in front of right hip.
  3. Keep torso upright and core engaged.
  4. Hold 20–30s per side.

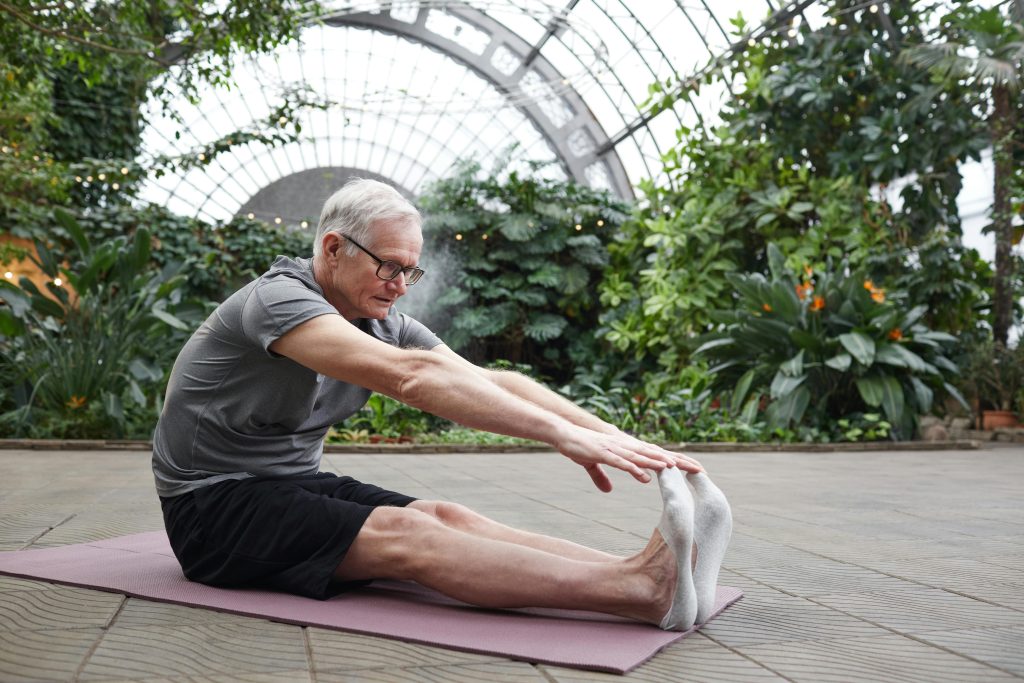
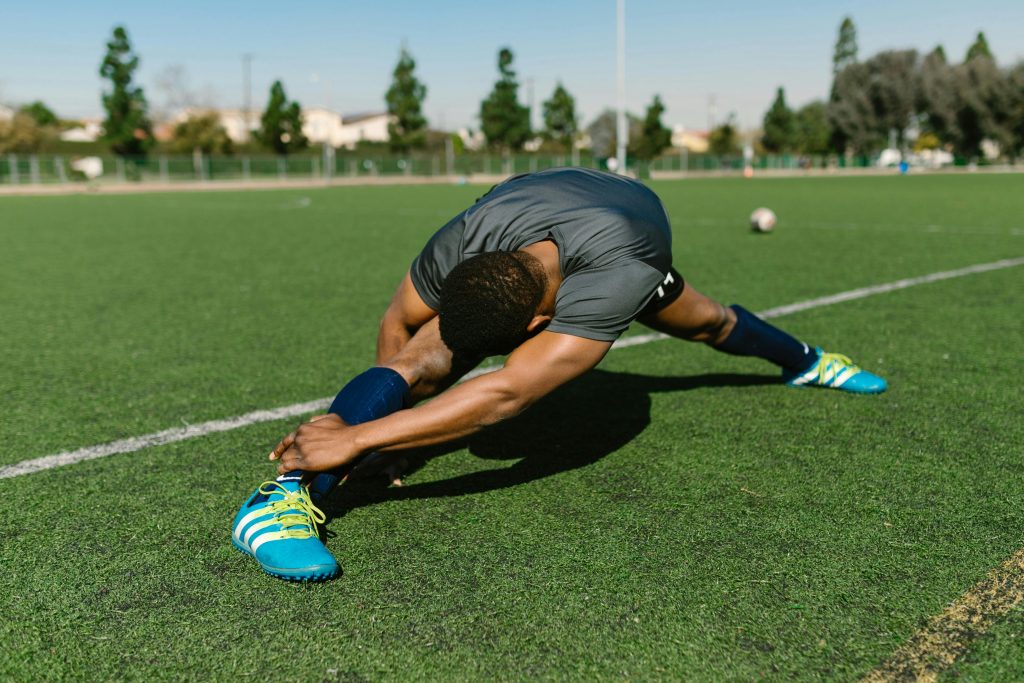
5. Seated Hamstring Stretch

Targets: Hamstrings

  1. Extend one leg forward with heel on floor, toes up.
  2. Sit tall and hinge at hips, reaching toward toes.
  3. Keep back straight; avoid rounding.
  4. Hold 20–30s per side.

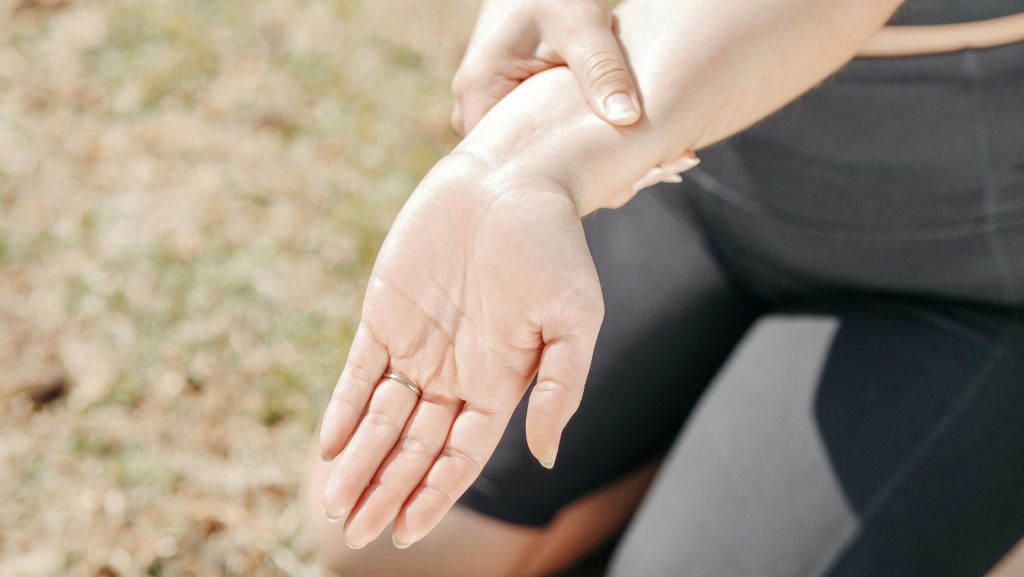
6. Wrist Flexor and Extensor Stretch

Targets: Forearm muscles, wrists

  • Flexor stretch:
    1. Extend right arm forward, palm up.
    2. With left hand, gently pull fingers down and back.
    3. Hold 20–30s, switch sides.
  • Extensor stretch:
    1. Extend right arm, palm down.
    2. Press fingers toward you with left hand.
    3. Hold 20–30s per side.

7. Shoulder Blade Squeeze

Targets: Rhomboids, middle trapezius

  1. Sit or stand with arms by sides.
  2. Draw shoulder blades together, tucking them downward (as if holding a pencil between them).
  3. Keep neck relaxed.
  4. Hold for 10s, repeat 8–10 reps.

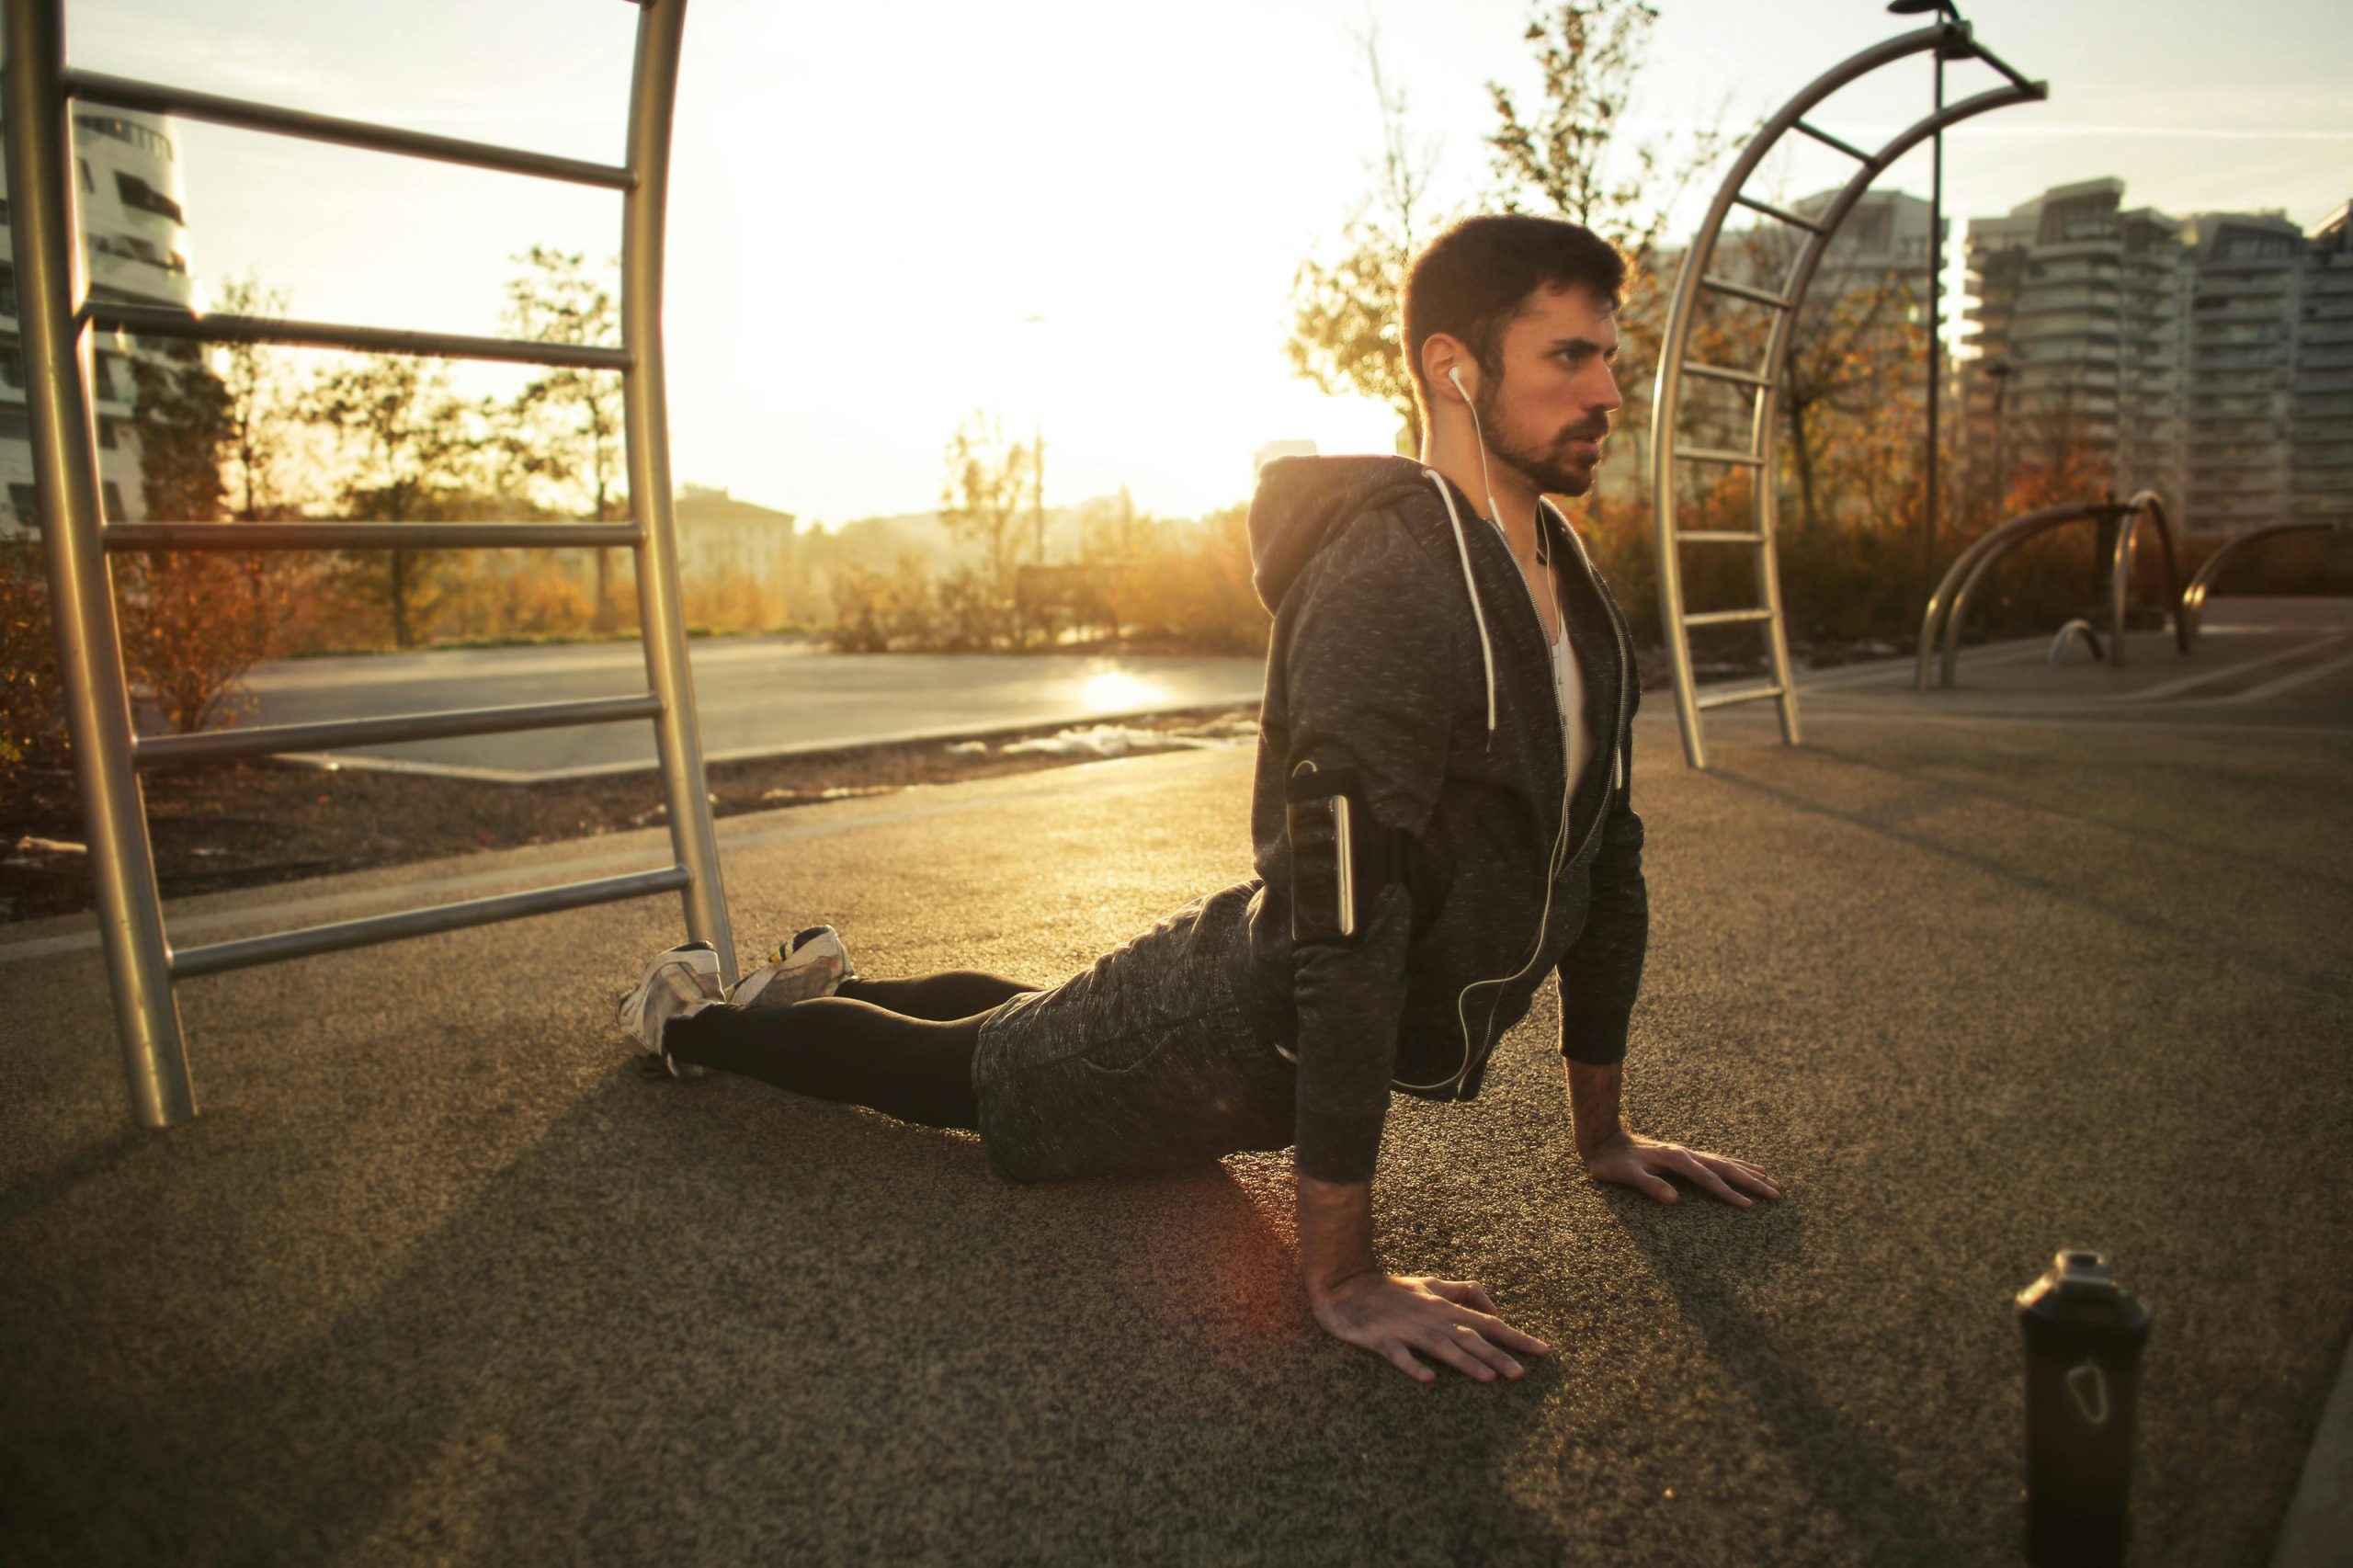
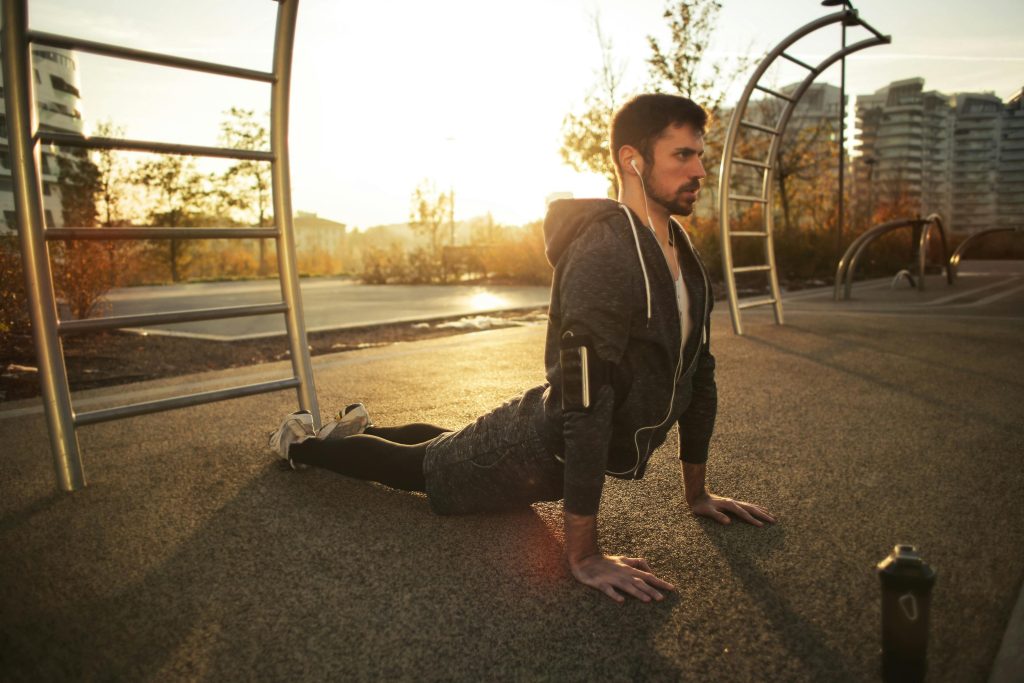
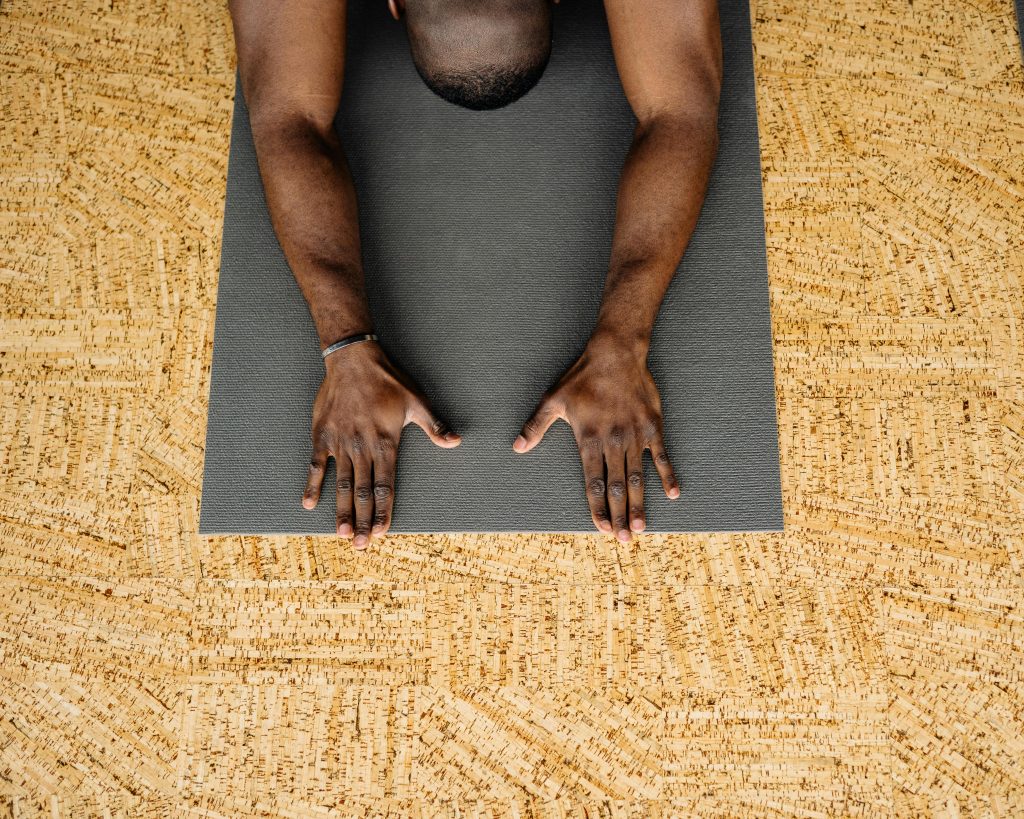
8. Cat-Camel (Chair Variation)

Targets: Spinal mobility, core

  1. Place hands on desk, walk back so hips over knees, hands under shoulders.
  2. Cat: Round upper back, tuck chin.
  3. Camel: Arch back, lift chest, look slightly up.
  4. Alternate slowly, 8–10 reps.

9. Seated Figure-Four Stretch

Targets: Piriformis, glutes

  1. Sit tall and cross right ankle over left thigh, just above knee.
  2. Gently press right knee downward and hinge forward at hips.
  3. Hold 20–30s, then switch sides.

10. Ankle Circles

Targets: Ankle mobility, circulation

  1. While seated, lift one foot slightly off floor.
  2. Rotate ankle clockwise 10 times, then counterclockwise.
  3. Repeat on other foot.

Integrating Stretches into Your Day

  • Micro-break reminders: Set a timer every 30–45 minutes.
  • Desk yoga routine: Perform 3–5 stretches during quick breaks.
  • Walking intervals: Combine stretches with short walks to boost circulation.

Conclusion

Incorporate these top 10 stretches into your daily work routine to alleviate tension, improve posture, and enhance productivity. Consistency is key: a few minutes every hour can profoundly impact comfort and well-being for desk-bound workers.

How to Stretch Safely After an Injury

Introduction

Recovering from an injury often brings a mix of relief and frustration: relief that you’re on the mend, frustration at limited mobility and discomfort. Stretching is a cornerstone of rehabilitation, helping restore flexibility, improve circulation, and reduce stiffness. However, doing too much too soon—or using improper technique—can exacerbate the injury or create new problems. In this comprehensive guide, we’ll explore how to stretch safely and effectively post-injury: from understanding your unique limitations and warming up properly to choosing the right types of stretches, monitoring pain signals, and progressing gradually. Whether you’ve strained a muscle, sprained an ankle, or undergone surgery, these evidence-based strategies will support your path to full and sustainable recovery.

Understanding Your Injury and Consulting Professionals

Know Your Diagnosis

Before beginning any stretching routine, clarify the nature and severity of your injury. Common categories include:

  • Acute strains and sprains: Overstretching or tearing muscle fibers or ligaments.
  • Tendinopathies: Inflammation or degeneration of tendons (e.g., Achilles tendinitis).
  • Post-surgical limitations: Scar tissue formation, joint stiffness after procedures.
  • Chronic conditions: Arthritis, low back pain, or repetitive-use injuries like tennis elbow.

Seek Expert Guidance

  • Physical therapist evaluation: A licensed therapist will assess your range of motion, muscle imbalances, and pain triggers to prescribe individualized stretches.
  • Medical clearance: For serious injuries or post-surgical cases, get written approval from your physician outlining any restrictions or recommended timelines.
  • Red-flag recognition: Learn signs that warrant pausing—sharp pain, swelling, numbness, or joint instability—and consult your provider if they arise.

The Principles of Safe Post-Injury Stretching

1. Warm Up Thoroughly

Stretching cold, injured tissues increases the risk of further tears. Begin with:

  • Low-impact cardio: 5–10 minutes of walking, stationary cycling, or water walking to raise tissue temperature and blood flow.
  • Dynamic movements: Gentle limb swings, ankle circles, or arm rotations—within pain-free ranges—to lubricate joints.

2. Respect Pain Signals

  • Discomfort vs. Sharp Pain: Mild stretching discomfort is acceptable; sharp, shooting pain is a warning to stop immediately.
  • Pain scale monitoring: Aim to stay below a 3–4 out of 10 on the pain scale. If you exceed that, ease off or modify the stretch.

3. Prioritize Quality Over Quantity

  • Slow and controlled: Hold each stretch for 15–30 seconds, moving in and out of the range gently.
  • Focus on form: Maintain proper alignment (neutral spine, relaxed shoulders) to avoid compensatory strain.

4. Progress Gradually

  • Micro-increments: Increase stretch intensity or duration by no more than 10% per week.
  • Frequency: Start with once daily, then progress to 2–3 times per day as tolerated.

5. Incorporate Both Static and Dynamic Techniques

  • Static stretches: Held positions that gently lengthen tissues—ideal for post-session cool-down.
  • Dynamic stretches: Movement-based stretches performed slowly to improve functional mobility—best used after warm-up.

Specific Stretching Strategies by Injury Type

A. Lower Back Strain

Key muscles: Hamstrings, hip flexors, lumbar paraspinals.

  1. Knee-to-Chest Stretch:
    • Lie on your back with knees bent.
    • Gently pull one knee toward your chest until mild stretch in lower back.
    • Hold 20–30 seconds, switch sides.
  2. Pelvic Tilts:
    • Lie supine, knees bent.
    • Tilt pelvis to flatten lower back against floor, hold 5 seconds.
    • Repeat 10–15 reps.
  3. Hamstring Foam-Release (Dynamic):
    • Use foam roller under hamstring, roll slowly to find tight spots.
    • Pause and breathe for 20 seconds, then continue rolling.

B. Shoulder Impingement or Rotator-Cuff Issues

Key muscles: Posterior capsule, pec minor, infraspinatus.

  1. Pendulum Swings:
    • Lean forward, non-injured arm supported on chair.
    • Let injured arm hang and swing gently in circles (small→large).
  2. Cross-Body Stretch:
    • Bring injured arm across chest, support elbow with opposite hand.
    • Feel stretch in back of shoulder; hold 15–20 seconds.
  3. Active Arm Raises (Pain-Free Range):
    • Slowly lift arm in front to shoulder height, lower back.
    • 10–15 controlled reps.

C. Ankle Sprain

Key muscles: Calves, peroneals, Achilles tendon.

  1. Seated Towel Stretch:
    • Loop towel around ball of foot, pull toes toward shin.
    • Hold 20–30 seconds; avoid bouncing.
  2. Alphabet Tracing (Dynamic):
    • Seated, extend injured leg; trace alphabet in air with big toe.
    • Encourages multi-plane mobility.
  3. Gastrocnemius Stretch:
    • Stand facing wall, injured foot back, heel down.
    • Lean forward until mild calf stretch; hold 20 seconds.

Incorporating Proprioceptive and Neuromuscular Control

Balance and Stability Drills

Improving proprioception reduces re-injury risk:

  • Single-leg stands: Hold onto support initially, progress to eyes closed.
  • Wobble board exercises: Gentle rocking to engage stabilizing muscles.

PNF (Proprioceptive Neuromuscular Facilitation) Techniques

  • Contract–Relax: Contract injured muscle against resistance 5 seconds, then relax and stretch further.
  • Hold–Relax with Agonist Contraction: After contraction-relax, actively contract the opposite muscle to enhance stretch.

Note: PNF should be performed under guidance, as intensity can be high.

Integrating Stretching Into Your Rehabilitation Routine

  1. Pre-Activity Routine:
    • Dynamic stretches and foam-release before exercise or daily tasks.
  2. Post-Activity Cool-Down:
    • Static stretches targeting injured area to promote flexibility and recovery.
  3. Separate Therapy Sessions:
    • Dedicated rehab time (10–15 minutes, 2–3× daily) focused on injury-specific stretches and motor-control exercises.
  4. Combine with Strength Training:
    • Balance flexibility with targeted strengthening to stabilize joints and support proper movement patterns.

When to Pause or Seek Further Help

  • Increased pain or swelling: More than mild post-stretch soreness suggests overstretching.
  • Persistent limited range after 4–6 weeks: Indicates need for re-evaluation by a therapist.
  • New onset of numbness or tingling: Possible nerve involvement—seek medical assessment.

Conclusion

Stretching after an injury is a balancing act: you need enough tension to promote tissue remodeling and flexibility, yet enough caution to avoid setback. By consulting professionals, warming up thoroughly, respecting pain signals, progressing gradually, and combining static, dynamic, and proprioceptive techniques, you’ll rebuild safe, functional range of motion. Tailor your approach to your specific injury, monitor your body’s responses, and integrate strengthening alongside stretching to ensure a durable recovery. With patience and consistency, you’ll regain mobility and return stronger than before.

The Difference Between Active and Passive Stretching

Introduction

Stretching is a cornerstone of fitness, rehabilitation, and overall well‐being. Yet not all stretches are created equal. Two of the most common categories—active and passive stretching—employ different techniques, engage different muscle groups, and serve distinct purposes. Understanding their differences allows you to tailor your routine for improved flexibility, injury prevention, and performance gains. In this article, we’ll define active and passive stretching, explore their unique mechanisms, benefits, drawbacks, and provide practical examples to help you integrate both into a balanced flexibility program.

What Is Active Stretching?

Definition and Mechanism

Active stretching occurs when you use your own muscular strength to hold a stretch position, without external assistance. In essence, the agonist muscle (the one doing the stretching) contracts to move the joint into the desired range of motion, while the antagonist muscle (the one being stretched) lengthens.

  • Example: Lifting your straight leg in front of you (hamstring stretch) and holding it using only your quadriceps and hip flexors, with no hand support.

Key Characteristics

  • Muscle activation: Requires engagement of the opposing muscle groups.
  • Proprioceptive demand: Builds neuromuscular control and body awareness.
  • Dynamic control: Often used as part of a dynamic warm-up to prepare muscles for activity.

Benefits of Active Stretching

  1. Improved muscular coordination: By activating one muscle group to stretch another, you enhance intermuscular communication.
  2. Injury prevention: Prepares muscles and tendons for dynamic movements, reducing the risk of strains.
  3. Functional flexibility: Mirrors the movement patterns you’ll use in sports or daily life.

Drawbacks and Considerations

  • Requires baseline strength: Beginners or those recovering from injury may struggle to hold positions.
  • Limited maximum range: You may not achieve as deep a stretch compared to passive methods.

What Is Passive Stretching?

Definition and Mechanism

Passive stretching involves using an external force to hold a stretch. This force can come from a partner, a strap, gravity, or a prop. The muscle being stretched (the agonist) remains relaxed, while an external aid moves the joint into a greater range of motion.

  • Example: Lying on your back and pulling one knee toward your chest with your hands, or using a resistance band to pull your leg into a hamstring stretch.

Key Characteristics

  • External assistance: Relies on gravity, tools, or a partner to maintain the stretch.
  • Muscle relaxation: The target muscle doesn’t actively contract, allowing a deeper stretch.
  • Static hold: Often held for longer durations (15–60 seconds) to encourage tissue elongation.

Benefits of Passive Stretching

  1. Increased range of motion: External force enables you to reach deeper into the stretch.
  2. Muscle relaxation: Ideal for cool-down routines and facilitating recovery.
  3. Accessibility: Suitable for individuals with limited strength or flexibility.

Drawbacks and Considerations

  • Reduced neuromuscular control: Doesn’t engage stabilizing muscles, so functional transfer to performance may be limited.
  • Potential overstretching: Without proper control, it’s easy to exceed comfort limits and risk injury.

Active vs. Passive: A Side-by-Side Comparison

FeatureActive StretchingPassive Stretching
Muscle EngagementAgonist muscles actively contractTarget muscles remain relaxed
AssistanceNo external aidRequires partner, prop, or gravity
Range of MotionModerate; limited by your own strengthDeeper; augmented by external force
ProprioceptionHigh—enhances neuromuscular awarenessLower—focuses on muscle lengthening
Best UseDynamic warm-ups, functional flexibilityCool-downs, rehabilitation, deep flexibility
Time HeldShort holds (5–15 seconds) or dynamic repetitionsLonger holds (15–60 seconds)
Risk of InjuryLower if performed with controlHigher if overstretched without feedback

When to Use Active Stretching

  1. Before Exercise (Warm-Up):
    • Leg Swings: Swing each leg forward and back, actively using the hip flexors and hamstrings to warm up the joint.
    • Arm Circles: Engage shoulder girdle muscles to prepare for overhead movements.
  2. Improving Sports-Specific Mobility:
    • Active Overhead Reach: Lift arms overhead by contracting upper-back muscles, stretching the lats actively before a shoulder workout.
    • Dynamic Hip Openers: Alternate lifting your knee to your chest, then rotating it outward to mimic running or kicking motions.
  3. Rehabilitation and Motor Control:
    • Active Ankle Dorsiflexion: While seated, flex your foot toward you and hold to strengthen anterior shin muscles and improve ankle dorsiflexion.

When to Use Passive Stretching

  1. After Exercise (Cool-Down):
    • Hamstring Pull: Lie supine and pull one leg into your chest using a strap, holding for 30 seconds to aid recovery.
    • Quad Stretch: Stand and pull your heel toward your buttocks with your hand or a strap, relaxing the quadriceps.
  2. Improving Extreme Flexibility:
    • Partner-Assisted Splits: A coach gently pushes your hips deeper to lengthen hip flexors and adductors.
    • Gravity-Assisted Backbend: Arch backward over a stability ball to passively open the chest and spine.
  3. Therapeutic and Relaxation Purposes:
    • Passive Neck Stretch: Sitting upright, let your head fall to one side, using your hand to gently increase the stretch on the opposite trapezius.
    • Child’s Pose with Support: Kneel and sit back on your heels, leaning forward over a bolster to passively stretch the lower back.

Blending Active and Passive Techniques for Optimal Flexibility

A balanced program incorporates both active and passive stretches at appropriate times:

  • Dynamic Warm-Up (Active Focus): 5–10 minutes of active, dynamic stretches to prime muscles and joints.
  • Main Workout: Perform strength or skill work.
  • Cool-Down (Passive Focus): 10–15 minutes of passive, static stretches to promote recovery and elongate muscle fibers.

By sequencing active before exercise and passive afterward, you maximize performance benefits and minimize injury risk.

Safety Tips and Best Practices

  • Listen to Your Body: Stretch to a point of mild tension, never sharp pain.
  • Control the Movement: Whether active or passive, avoid bouncing (ballistic stretching) to prevent muscle tears.
  • Warm Muscles First: Stretching cold muscles increases injury risk—use light cardio or active stretches to warm up.
  • Hold Times:
    • Active: 5–15 seconds or 5–10 controlled repetitions.
    • Passive: 15–60 seconds, depending on experience level.
  • Consistency: Flexibility improves with regular practice—aim for 3–5 sessions per week.

Conclusion

Active and passive stretching each serve valuable roles in a well-rounded fitness regimen. Active stretching builds functional mobility, neuromuscular control, and prepares your body for dynamic activities. Passive stretching excels at achieving deeper lengthening and aiding recovery post-exercise. By understanding their differences and strategically combining both methods—dynamic active stretches before your workout and passive holds afterward—you’ll enhance flexibility, reduce injury risk, and support overall performance and well-being.

How Yoga Poses Enhance Flexibility: A Comprehensive Guide

Introduction

Flexibility isn’t just about touching your toes—it’s a cornerstone of overall physical health, injury prevention, and improved athletic performance. For many, tight muscles and stiff joints impede movement, causing discomfort and limiting daily activities. Yoga, with its blend of static stretches, dynamic transitions, and mindful breath work, offers a proven pathway to greater suppleness and range of motion. In this post, we’ll explore how specific yoga poses target key muscle groups, the physiological mechanisms behind improved flexibility, and practical strategies to integrate these postures into your routine safely. Whether you’re a seasoned yogi or a curious beginner, you’ll learn how to harness yoga’s transformative power to unlock your body’s full potential.

Why Flexibility Matters

  • Enhanced mobility: Improved joint range of motion makes everyday tasks—tying shoelaces, reaching overhead, bending—easier and pain-free.
  • Injury prevention: Flexible muscles and connective tissues absorb stress more evenly, reducing the risk of strains, sprains, and overuse injuries.
  • Posture & alignment: Tight hip flexors, hamstrings, or chest muscles can pull your spine out of alignment; yoga counteracts these imbalances.
  • Mind–body connection: The mindful aspect of yoga encourages body awareness, helping you notice areas of tension and release them over time.

Analogy: Think of your body like a well-oiled machine—regular stretching through yoga keeps the “gears” running smoothly, preventing jams and breakdowns.

How Yoga Improves Flexibility: The Science

1. Muscle Lengthening Through Static Stretch

  • Mechanism: Holding a stretch for 30–60 seconds gradually changes the resting length of muscle fibers and connective tissue (the Golgi tendon organ response).
  • Benefit: Over time, muscles and tendons remodel at a longer length, allowing joints to move through a deeper range of motion.

2. Dynamic Mobility via Vinyasa Flows

  • Mechanism: Moving systematically through poses warms tissues, increases blood flow, and promotes synovial fluid production in joints.
  • Benefit: Dynamic, active stretches teach neuromuscular coordination, helping muscles relax into length rather than resist it.

3. Neurological Adaptation and Relaxation

  • Mechanism: Yoga’s emphasis on breath and mindful focus shifts the nervous system from “fight-or-flight” (sympathetic) to “rest-and-digest” (parasympathetic), reducing protective muscle tension.
  • Benefit: Relaxed muscles stretch more easily, and your brain learns to override reflexive resistance to lengthening.

4. Fascia Release and Hydration

  • Mechanism: Deep stretches and gentle twists massage the fascia (connective tissue network), helping break up adhesions and improve tissue glide.
  • Benefit: Hydrated, pliable fascia supports greater overall flexibility and better force transmission between muscles.

Key Yoga Poses for Flexibility

H2: Hip-Opening Poses

1. Pigeon Pose (Eka Pada Rajakapotasana)

  • Targets: Hip rotators (piriformis), glutes, hip flexors
  • How to practice:
    1. From Downward-Facing Dog, bring your right knee forward toward your right wrist.
    2. Extend your left leg straight back, keeping hips square.
    3. Fold forward, resting on forearms or forehead, and breathe deeply for 5–10 breaths.

Tip: Place a block or folded blanket under the right hip if it doesn’t reach the floor to maintain proper alignment.

2. Garland Pose (Malasana)

  • Targets: Inner thighs, groin, lower back
  • How to practice:
    1. Squat with feet slightly wider than hip-width, toes pointing out.
    2. Bring palms together at heart center, press elbows into inner knees.
    3. Lengthen your spine, gently rocking side to side to deepen the stretch.

H2: Hamstring and Calf Stretches

3. Standing Forward Fold (Uttanasana)

  • Targets: Hamstrings, calves, lower back
  • How to practice:
    1. From standing, hinge at the hips and fold forward, bending knees slightly if needed.
    2. Let your head hang heavy; hold opposite elbows or reach for the floor/shins.
    3. With each exhale, soften into the stretch to gradually straighten legs.

Modification: Use blocks under your hands if you can’t reach the floor without rounding your back.

4. Runner’s Lunge with Forward Tilt

  • Targets: Hip flexors, hamstrings, calves
  • How to practice:
    1. From Downward Dog, step your right foot forward outside the right hand in a low lunge.
    2. Drop back onto the left knee, press hips forward, and then straighten the front leg for a hamstring stretch.
    3. Shift your torso back and forth to alternate between hip flexor and hamstring opening.

H2: Spine and Shoulder Flexibility

5. Cat–Cow Stretch (Marjaryasana–Bitilasana)

  • Targets: Spinal mobility, shoulders
  • How to practice:
    1. Begin on all fours with wrists under shoulders, knees under hips.
    2. Inhale, lift chest and tailbone (Cow); exhale, round spine and tuck tailbone (Cat).
    3. Flow for 1–2 minutes, synchronizing movement with breath.

6. Bridge Pose (Setu Bandha Sarvangasana)

  • Targets: Lower back, hip flexors, chest
  • How to practice:
    1. Lie on your back with knees bent, feet hip-width apart.
    2. Press into feet and lift hips toward the ceiling.
    3. Interlace hands under your back or rest arms alongside body.
    4. Hold for 5–8 breaths, then release with control.

Structuring a Flexibility-Focused Yoga Practice

H2: Warm-Up: Awakening the Muscles

  • Start with gentle joint rotations (ankles, hips, shoulders).
  • Follow with Cat–Cow flows to mobilize the spine and awaken the core.

H2: Dynamic Sequence: Active Stretching

  • Sequence Example:
    1. Downward-Facing Dog → Runner’s Lunge (right) → Forward Fold → Runner’s Lunge (left) → Downward Dog.
    2. Repeat 3–5 rounds, linking breath to movement (inhale to lunge, exhale to fold).

H2: Deep Stretching: Static Holds

  • Incorporate 3–5 minutes of deep holds in Pigeon Pose (each side).
  • Add Garland Pose and Standing Forward Fold with longer holds (1–2 minutes each).

H2: Cool-Down and Savasana

  • Wind down with gentle supine twists and a supported Bridge or Reclined Bound Angle Pose (Supta Baddha Konasana).
  • Finish with at least 3–5 minutes in Savasana to integrate the practice and allow tissues to settle.

Tips for Safe and Effective Flexibility Gains

  1. Breathe consciously: Never hold your breath; exhalations help you release into stretches and calm the nervous system.
  2. Honor your edge: Stretch to the point of “comfortable tension,” not pain—mild discomfort is normal, sharp pain is a red flag.
  3. Consistency over intensity: A daily 10-minute routine trumps sporadic 60-minute sessions.
  4. Mindful progression: Track which poses feel tighter and revisit them regularly, gently increasing duration or depth.
  5. Rest and recovery: Allow 24–48 hours between intense flexibility sessions for muscle and fascia to remodel.

Expert Insight:
“Flexibility is as much neurological as it is structural. By combining mindful breath with progressive stretches, you teach both body and mind to let go of habitual tension patterns.”
— Dr. Anjali Patel, Physical Therapist and Yoga Instructor

Conclusion

Yoga offers a holistic, sustainable path to enhanced flexibility—combining the benefits of static stretching, dynamic movement, and mindful relaxation. By targeting key areas such as hips, hamstrings, spine, and shoulders through poses like Pigeon, Garland, and Bridge, you can unlock deeper ranges of motion and foster better posture, reduced pain, and injury resilience. Structure your practice with a warm-up, dynamic flow, deep holds, and a restorative cool-down, and remember that breath, consistency, and respectful progression are your greatest allies. Step onto your mat today with curiosity and patience, and watch your body transform one mindful stretch at a time.

How Breathing Enhances Deep Stretching: Unlocking Your Flexibility Potential

Introduction

Breathing is often the unsung hero of effective stretching. While many of us focus on the position of our limbs or the depth of the stretch, the rhythm and control of our breath can make all the difference between a tense, shallow stretch and a deeply restorative one. In this post, we’ll explore the science behind breath-driven flexibility, share practical breathing techniques to deepen your stretches safely, and offer a sample routine to help you integrate mindful breathing into your daily practice. Whether you’re a seasoned yogi, an athlete looking to improve performance, or simply someone seeking greater mobility, understanding the role of breathing in deep stretching will elevate your practice—and help protect you from injury.

The Science Behind Breath and Muscle Function

The Physiology of Breathing and Muscle Relaxation

Deep, controlled breathing activates the parasympathetic nervous system—our body’s “rest-and-digest” mode. On inhalation, the diaphragm contracts and the rib cage expands; on exhalation, the diaphragm relaxes and the rib cage compresses. This rhythmic movement:

  • Lowers heart rate and blood pressure, signaling muscles to soften.
  • Reduces the stretch reflex, the body’s automatic protection against overstretching.
  • Enhances mind–body awareness, so you notice subtle muscle tensions and adjust accordingly.

Oxygen Delivery and Metabolic Clearance

Muscle fibers require oxygen to contract and recover. When you hold a stretch:

  • Oxygen demand rises in the targeted tissues.
  • Deep exhalation flushes out carbon dioxide and metabolic byproducts like lactic acid, reducing the “burn” and allowing you to go deeper more comfortably.
  • Consistent breathing maintains a balance between oxygen intake and waste removal, preventing cramps and improving recovery.

Breath Techniques for Enhancing Deep Stretching

Diaphragmatic (Belly) Breathing

What it is: Inhaling deeply so your belly expands, not just your chest.
How to practice:

  1. Lie on your back or sit upright.
  2. Place one hand on your chest, the other on your belly.
  3. Inhale through your nose, feeling your belly rise for 4 counts.
  4. Exhale through pursed lips for 6 counts, feeling your belly fall.
    Benefit: Maximizes lung capacity and engages core muscles for stability.

Box Breathing

What it is: A square-pattern breath popular among athletes and first responders.

  • Inhale for 4 seconds.
  • Hold for 4 seconds.
  • Exhale for 4 seconds.
  • Hold for 4 seconds.
    Benefit: Centers the mind, reduces stress, and primes muscles for controlled stretching.

The 3-5-7 Stretch Breath

A simple yet powerful pattern perfectly suited to deep stretching:

  1. Inhale for 3 seconds, filling the belly.
  2. Hold for 2 seconds (brief pause).
  3. Exhale for 5–7 seconds, easing deeper into the stretch.
  4. Repeat for 3–5 cycles in each position.
    Benefit: Extends the comfortable “window” of the stretch by emphasizing a long, controlled exhale.

Synchronizing Breath with Movement

Dynamic vs. Static Stretching

  • Dynamic stretching involves movement (e.g., leg swings). Sync your inhale as you prepare, exhale as you move into the position.
  • Static stretching holds a position. Use the 3-5-7 breath: sink deeper on the extended exhalation without bouncing.

Practical Tips for Breath–Movement Sync

  • Pre-Stretch Check: Before you enter a stretch, take two diaphragmatic breaths to calm your system.
  • Move on the Breath: Transition into each new angle on an inhale; settle in on the exhale.
  • Micro-Adjustments: If you hit resistance, pause and take three cleansing breaths, then see if you can find another millimeter of depth.
  • “Float” on Your Exhale: Imagine your body becoming as light as a balloon releasing air—softening as you let go.

Mind–Body Connection and Safety Considerations

Cultivating Mindfulness

Breath-focused stretching is inherently meditative. As you breathe:

  • Notice sensations—heat, mild discomfort, or ease.
  • Label thoughts—if your mind wanders, notice it without judgment and return to your breath.
  • Use a mantra like “breathe into the space” to reinforce focus.

Avoiding Overstretching and Injury

Breathing helps you recognize warning signs:

  • Sharp pain often comes with breath-holding—if you find yourself gasping or holding your breath, back off the stretch.
  • Dizziness or lightheadedness can mean you’re over-ventilating; slow your rhythm.
  • Uneven tension on one side signals asymmetry—use breath to explore balance and adjust posture.

Integrating Breath Work into Your Routine

Sample Deep Stretching Routine with Breath Cues

StretchDurationBreath Pattern
Child’s Pose1–2 minutes3-5-7 breath cycles
Seated Hamstring Stretch30 seconds per sideExhale to soften, inhale to reset
Pigeon Pose45 seconds per sideBox breathing (4-4-4-4)
Butterfly Stretch1 minuteDiaphragmatic breathing
Supine Spinal Twist30 seconds per sideInhale to open, exhale to deepen

Tools and Apps to Support Your Practice

  • Breathwork Apps (e.g., Breathe2Relax, Prana Breath): guide timing and patterns.
  • Yoga Blocks and Straps: help you find and maintain position so you can focus on breath.
  • Wearable Biofeedback Devices: some trackers monitor heart-rate variability as a proxy for parasympathetic activation.

Conclusion

Breathing is more than a background process—it’s the key that unlocks deeper, safer, and more effective stretches. By activating the parasympathetic nervous system, enhancing oxygen delivery, and grounding the mind, controlled breath transforms your practice from a mere physical routine into a holistic, restorative experience. Start by exploring diaphragmatic and box-breathing techniques, then integrate patterns like the 3-5-7 stretch breath. With mindful breath and movement synchronization, you’ll not only improve flexibility but also cultivate a calmer, more focused state of mind—on and off the mat.

How to Progress from Beginner to Advanced Splits: A Complete Guide

Introduction

Achieving full front or middle splits is a hallmark of flexibility and strength that benefits dancers, martial artists, yogis, and fitness enthusiasts alike. Yet, it can feel daunting—especially if your hips and hamstrings feel tight or you’ve struggled to make progress in the past. The good news is that with a structured approach emphasizing gradual progression, proper warm-up, targeted mobility, and consistent practice, anyone can work safely from gentle stretch holds to full splits over time. In this guide, you’ll discover step-by-step progressions, expert tips, mobility drills, and common pitfalls to avoid on your journey from beginner to advanced splits.

Understanding the Splits Variations

Before diving into exercises, it’s important to know the two primary splits you may pursue:

  • Front Splits (Hanumanasana): One leg extended forward, the other back, torso upright.
  • Middle Splits (Straddle Splits): Both legs extended to the sides in a “V” shape, torso centered.

Each variation recruits different muscle groups:

  • Front splits demand hamstring flexibility in the forward leg and hip flexor/quadriceps flexibility in the back leg.
  • Middle splits require adductor (inner thigh) flexibility and hip external rotation.

Prerequisites and Safety Considerations

  1. Baseline Mobility: You should comfortably sit in a low lunge and a straddle of about 45° on each side.
  2. No Pain Principle: Discomfort is normal; sharp pain indicates you’re overstretching.
  3. Consistency Over Intensity: Aim for 5–6 short sessions (10–15 minutes) per week rather than infrequent long sessions.
  4. Listen to Your Body: If joints feel unstable or you experience radiating pain, back off and focus on mobility drills.

Warm-Up and Mobility Foundations

A proper warm-up raises muscle temperature and primes your nervous system:

  1. General Warm-Up (5–10 minutes):
    • Light cardio (jogging in place, jump rope) to increase blood flow.
    • Dynamic leg swings: Front-to-back and side-to-side, 10 each leg.
  2. Dynamic Mobility Drills:
    • Deep Lunge with Hip Circles: In low lunge, circle hips clockwise and counter-clockwise, 8 each side.
    • Cossack Squats: Shift weight side to side in a wide stance, keeping one leg straight, 8 reps each side.
    • Leg Swings with Isometric Holds: Swing the leg up, hold 2–3 seconds at the top, lower with control, 8 each direction.

Beginner Progressions (Weeks 1–4)

Focus on building tolerance in basic holds and introducing passive flexibility.

1. Half Splits (Ardha Hanumanasana)

  • Setup: From low lunge, shift the hips back so the front leg straightens, heel on the floor.
  • Hold: 30 seconds; 2–3 rounds each side.
  • Tip: Keep hips square; flex the front foot to protect the hamstring tendon.

2. Seated Straddle (Butterfly with Legs Wider)

  • Setup: Sit with soles together, then slowly walk heels away to widen the angle.
  • Hold: 30–45 seconds; 2–3 rounds.
  • Modification: Prop hands behind you to maintain an upright torso.

3. Pigeon Pose (Eka Pada Rajakapotasana)

  • Forward Variation: Foot of front leg at calf or shin level; fold forward to target glutes and external rotators.
  • Hold: 30 seconds; 2 rounds each side.

4. Wall-Assisted Split Slides

  • Setup: Lie face-down with front foot against a wall, back leg sliding down.
  • Movement: Use hands to gently press hips toward the wall until you feel mild tension.
  • Hold: 20–30 seconds; 2 rounds each side.

Intermediate Progressions (Weeks 5–8)

Once you can hold the beginner poses with ease, deepen the stretch with loaded variations and longer holds.

1. Elevated Half Splits

  • Setup: Place front foot on a low block or step (4–6 inches).
  • Action: Straighten the front leg and lean torso forward to intensify.
  • Hold: 45–60 seconds; 2–3 rounds.

2. Straddle with Forward Fold

  • Setup: Sit in a wide straddle, hinge at hips to fold toward center, then each leg.
  • Sequence: Center → Left leg → Center → Right leg → Center.
  • Hold: 20–30 seconds per position.

3. Active Leg Raises

  • Front Split Strength: From kneeling, lift the front leg with hip flexor engagement to parallel; lower slowly.
  • Middle Split Strength: In seated straddle, lift one leg off the floor 4–6 inches, hold 2 seconds; 8–10 reps each side.

4. Weighted Stretches

  • Caution: Use light weights (2–5 lbs) on thighs to add gentle load in half splits or straddles.
  • Hold: 30–45 seconds; develop soft tissue tolerance to loading.

Advanced Techniques (Weeks 9–12+)

With solid intermediate flexibility and strength, transition to full splits and dynamic control.

1. Assisted Full Splits

  • Props: Use yoga blocks under both hands at hips-height.
  • Method: Slide into the split, hands on blocks for support, torso upright.
  • Hold: 30–60 seconds; 2–3 rounds each variation.

2. Active Flexibility Drills

  • Isometric Holds: In full split, actively press legs into the floor without sliding further—engage muscle without motion for 10 seconds, then relax.
  • Eccentric Slides: From full split, use hands to push hips slightly lower, then use core/leg strength to lift halfway back; 6–8 reps.

3. Dynamic Split Pulses

  • Setup: In front or middle split.
  • Pulsing: Minor up-and-down pulses (~1 inch) at the end range for 10–15 seconds to promote blood flow and tissue remodeling.

4. Proprioceptive Neuromuscular Facilitation (PNF)

  • Contract-Relax Technique: In split, gently contract the muscles opposing the stretch (e.g., glutes and hamstrings in front split) for 5 seconds, then relax and slide deeper.
  • Repetitions: 3–4 cycles per side.

Common Pitfalls and How to Avoid Them

PitfallSolution
Skipping Warm-UpAlways start with 10 min cardio + mobility drills.
Bouncing in StretchesUse slow, controlled movements; avoid ballistic bouncing.
Ignoring Pain SignalsDiscomfort is ok; sharp or joint pain is not—ease off immediately.
OvertrainingSchedule 1–2 rest or light activity days per week.
Neglecting StrengthBalance flexibility work with strength drills to support joints.

Tips for Long-Term Success

  • Track Your Progress: Take weekly photos or measure hip-to-floor distance in splits.
  • Stay Consistent: Small daily gains beat sporadic marathon sessions.
  • Cross-Train: Incorporate hip-strengthening exercises (glute bridges, clamshells) to support flexibility.
  • Mindful Breathing: Exhale into the stretch to help muscles relax deeper.
  • Professional Guidance: Consider occasional sessions with a qualified flexibility or yoga coach.

Conclusion

Progressing from beginner to advanced splits is a journey of patience, consistency, and smart training. By respecting your body’s current limits, following a gradual progression—from half splits and dynamic drills to fully supported splits and PNF techniques—and avoiding common mistakes, you can safely unlock greater range of motion and muscular control. Commit to regular practice, track your improvements, and blend flexibility with strength work for stable, sustainable results. With time and dedication, you’ll soon experience the confidence and functional benefits of mastering the full splits.

How to Safely Increase Ankle Dorsiflexion

Introduction

Limited ankle dorsiflexion—the ability to flex your foot upward toward the shin—can hinder performance in sports, compromise squat depth, and contribute to knee, hip, and low-back pain. Whether you’re an athlete chasing deeper lunges or a weekend warrior recovering from an old ankle sprain, improving dorsiflexion enhances mobility, stability, and movement quality. In this comprehensive guide, we’ll explore the anatomy behind ankle dorsiflexion, how to assess your current range of motion, and step-by-step, evidence-based techniques to safely regain and maintain optimal flexibility. By the end, you’ll have a practical toolkit of stretches, mobilizations, and strength exercises to unlock greater ankle mobility and power up your workouts.

Understanding Ankle Dorsiflexion

What Is Dorsiflexion? (H2)

Ankle dorsiflexion refers to the action of lifting the top of the foot toward the shin. It occurs primarily at the talocrural joint, where the tibia and fibula meet the talus bone.

Why It Matters (H2)

  • Squat Mechanics: Adequate dorsiflexion allows knees to track forward and maintain an upright torso in squats and lunges.
  • Gait Efficiency: Proper ankle mobility promotes a smooth heel-to-toe walking pattern, reducing compensations up the kinetic chain.
  • Injury Prevention: Restricted dorsiflexion increases stress on the knees and hips, elevating risk for strains and tendinopathies.

Assessing Your Current Range of Motion

Wall-Ankle Dorsiflexion Test (H3)

  1. Stand facing a wall, one foot a few inches away.
  2. Keeping heel flat, bend your knee to touch the wall.
  3. Measure the distance from big toe to wall; aim for ≥10 cm (4 in) without heel lift.

Weight-Bearing Lunge Test (H3)

  • Use a goniometer or smartphone app to measure the tibia-to-floor angle as you lunge toward a wall.
  • Normal is around 35–40°; values below 25° indicate restricted mobility.

Common Causes of Limited Dorsiflexion

  1. Muscle Tightness: Gastrocnemius and soleus (calf muscles) can limit upward flexion.
  2. Joint Capsule Restrictions: Stiffness in the ankle joint capsule or talocrural joint.
  3. Previous Injuries: Scar tissue or chronically immobilized ankles after sprains or fractures.
  4. Connective Tissue Shortening: Shortened Achilles tendon or plantar fascia contributions.

Techniques to Safely Improve Dorsiflexio1. Calf Muscle Stretches (H2)

Gastrocnemius Stretch (H3)

  • How to: Stand facing a wall; place hands on the wall. Step one foot back with knee straight, heel down. Lean forward until you feel a stretch in upper calf.
  • Duration: Hold 30 s, 3–4 reps per side.

Soleus Stretch (H3)

  • How to: From the gastrocnemius stretch, bend the back knee slightly while keeping the heel down to target the deeper soleus.
  • Duration: Hold 30 s, 3–4 reps per side.

2. Joint Mobilizations (H2)

Ankle Dorsiflexion Mobilization with Band (H3)

  • Setup: Anchor a resistance band around a sturdy object at floor level. Loop band around ankle just above the malleoli (ankle bones).
  • Movement: Step forward to create band tension. Rock knee forward over toe, holding for 2–3 s at end range. Repeat 10–15 reps.
  • Tip: Keep heel firmly planted and the band pulling slightly from behind.

Self-Mobilization with Stick (H3)

  • How to: Sit with leg extended. Grip a sturdy dowel or broom handle under the forefoot, pull toes toward you while gently pressing the knee forward over the toes.
  • Reps: 10–12 gentle pulls, holding each for 2 s.

3. Dynamic Stretching (H2)

Walking Knee-to-Wall Drill (H3)

  • How to: Assume a half-kneeling position facing a wall. Place front foot close to wall. Drive knee toward wall over toes, then return knee back and repeat 10–12 times per side.
  • Progression: Add ankle dorsiflexion band mobilizations for greater intensity.

Heel Raises into Dorsiflexion (H3)

  • How to: Stand on flat ground, rise up onto toes (plantarflex), then slowly lower heel below floor level by stepping onto a low platform (optional). Rock heel back under platform to increase dorsiflexion.
  • Reps: 2 sets of 10–15 controlled reps.

4. Strengthening Exercises (H2)

Eccentric Calf Raises (H3)

  • How to: Stand on a step with heels off edge. Push up with both feet; shift weight to one foot and slowly lower that heel toward floor level.
  • Sets/Reps: 3×10 per side, 2–3 times/week.

Tibialis Anterior Work (H3)

  • How to: Sit with legs extended. Loop a resistance band around forefoot with band anchored in front. Dorsiflex ankle against band resistance.
  • Reps: 3×12–15 to strengthen the anterior shin muscles supporting dorsiflexion.

5. Soft-Tissue Release (H2)

Foam Roller Calf Release (H3)

  • How to: Sit with foam roller under calves. Roll slowly from ankle to knee, pausing on tender spots for 20–30 s.
  • Frequency: 2–3 minutes per leg, 3–4 times/week.

Tennis Ball Release (H3)

  • How to: Stand facing a wall, place tennis ball under foot arch. Apply moderate pressure and roll from heel to ball of foot, focusing on sore spots.
  • Duration: 1–2 minutes per foot.

Programming and Progression

Consistency Is Key (H2)

  • Frequency: Daily or at least 4–5 times/week for mobilizations and stretches.
  • Duration: Commit 10–15 minutes per session; integrate into warm-ups and cool-downs.

Gradual Load Increase (H2)

  • Start Light: Begin without resistance or very light bands.
  • Monitor Discomfort: Mild tension is expected; sharp pain indicates excessive load or poor mechanics.
  • Advance Reps and Band Tension: Once able to perform 15 reps pain-free, increase band resistance or volume by 10%.

Integrate Into Functional Movements (H2)

  • Goblet Squat with Heel Elevation: Place small plates under heels and squat to depth—encourages increased dorsiflexion and proper alignment.
  • Lunge Variations: Forward, reverse, and lateral lunges emphasize ankle mobility in different planes.

Precautions and Common Mistakes

Avoid Overstretching (H2)

  • Pushing into pain can irritate the joint capsule. Aim for “comfortable tension” and back off if sharp pain occurs.

Maintain Proper Knee Alignment (H2)

  • Keep the knee tracking over the second toe to prevent valgus collapse or undue stress on ligaments.

Don’t Neglect the Whole Kinetic Chain (H2)

  • Limited hip or thoracic mobility can make the ankle compensate. Include hip flexor, glute, and trunk mobility work for balanced movement.

Conclusion

Improving ankle dorsiflexion is a multifaceted process involving stretching tight muscles, mobilizing joints, releasing soft tissue, and strengthening supportive musculature. By consistently applying the targeted techniques outlined—calf stretches, band mobilizations, dynamic drills, and strength work—you’ll gradually unlock greater range of motion, reduce injury risk, and enhance performance in everyday activities and athletic pursuits. Remember: progress takes patience. Stay diligent with daily mobility work, track your gains with periodic assessments, and integrate newfound ankle flexibility into your functional movements for lasting improvements.

Common Mistakes in Forward Fold Stretches (Uttanasana)

Introduction

The forward fold (Uttanasana in yoga) is a deceptively simple-looking stretch that targets the hamstrings, calves, lower back, and hips. Yet many practitioners—beginners and seasoned yogis alike—make small errors that limit its benefits or even lead to strain. In this post, we’ll explore the most common mistakes in forward folds, why they happen, and how to correct them for a safe, effective stretch that truly opens your posterior chain.

1. Locking or Hyperextending the Knees

Why It Happens

  • Aiming for the deepest possible fold, students often “lock” their knees straight.
  • Belief that perfectly straight legs equal better hamstring stretch.

The Risks

  • Joint strain: Hyperextension stresses knee ligaments.
  • Hamstring disengagement: Locked knees recruit less hamstring activation, shifting strain toward the lower back.

How to Fix It

  • Micro-bend your knees: Keep a slight soft bend—imagine a micro-“spring” in each knee.
  • Engage the quadriceps: Gently lift your kneecaps to activate the front thigh, which supports the hamstrings.

2. Rounding the Lower Back (Spinal Flexion)

Why It Happens

  • Tight hamstrings pull the pelvis backward, creating a rounded lower spine.
  • Focusing solely on reaching the floor rather than maintaining spinal length.

The Risks

  • Compression of lumbar discs: Over time, repeated rounding can aggravate lower-back issues.
  • Shallow stretch: You miss out on a full hamstring and hip hinge.

How to Fix It

  • Hinge from the hips: Initiate the fold by tipping the pelvis forward (tucking the tailbone under) rather than bending through the spine.
  • Lengthen the spine: Imagine drawing your chest toward your thighs, maintaining as much length as possible before folding deeper.

3. Holding Tension in the Neck and Shoulders

Why It Happens

  • Gripping tension to try and “pull” deeper into the fold.
  • Worry that floppy arms will reduce the stretch’s intensity.

The Risks

  • Neck strain: Excessive neck tension can lead to headaches.
  • Upper-back tightness: Tensing the shoulders negates the full relaxation aspect of the forward fold.

How to Fix It

  • Soft gaze: Let your head hang heavy, with a relaxed neck.
  • Shoulders away from ears: Draw the shoulder blades gently down the back.
  • Relax the arms: Allow your hands to rest wherever they reach—on shins, blocks, or the floor.

4. Forcing Hands to the Floor

Why It Happens

  • Belief that fingertips or palms must touch the mat for a proper Uttanasana.
  • Comparison with others in class.

The Risks

  • Overstretching: Forcing the reach can pull muscles beyond their capacity, causing microtears.
  • Compromised alignment: You may sacrifice hip hinge and spinal length just to touch the ground.

How to Fix It

  • Use props: Place yoga blocks under your hands at shin or hip height.
  • Focus on hinge depth, not hand placement: It’s better to fold less deeply with proper form than collapse forward to reach the floor.

5. Neglecting Breath Awareness

Why It Happens

  • Tendency to hold the breath when feeling discomfort.
  • Mind wanders to tension rather than anchor in the breath.

The Risks

  • Muscle tension: Breath-holding creates muscular rigidity, making the stretch feel sharper.
  • Reduced relaxation: You lose the calming benefits of a mindful forward fold.

How to Fix It

  • Inhale to lengthen: On each in-breath, subtly lift through the crown of the head, creating more space along the spine.
  • Exhale to fold: With each out-breath, soften deeper into the fold—like peeling a layer off your back.

6. Ignoring Hip Mobility

Why It Happens

  • Overemphasis on hamstring flexibility, overlooking the hip hinge.
  • Skipping preparatory hip-openers before deep folding.

The Risks

  • Sacral misalignment: Without proper hip rotation, the pelvis may twist or shift unevenly.
  • Shallow stretch: Tight hip flexors limit the ability to tilt the pelvis forward fully.

How to Fix It

  • Warm up hips first: Incorporate lunges, Pigeon Pose, or dynamic leg swings before deep forward folds.
  • Focus on hip crease: Think about drawing your hip points back and up as you hinge forward.

7. Rushing the Movement

Why It Happens

  • Impatience to “get deeper” quickly, especially in a heated class.
  • Treating the forward fold like a static stop rather than a dynamic, mindful stretch.

The Risks

  • Muscle strain: Fast, forceful movements can lead to overstretching.
  • Missed cues: You overlook subtle alignment corrections in the haste.

How to Fix It

  • Slow and mindful: Move into the fold over several breaths, checking alignment at each stage.
  • Dynamic folding: On inhalations, lengthen the spine; on exhalations, fold slightly deeper—repeat for 3–5 cycles before settling.

Conclusion

The forward fold is a foundational stretch with immense benefits—improved flexibility, spinal decompression, and mental calm. Yet small alignment errors can turn it from a nurturing posture into a risky one. By avoiding locked knees, rounding the spine, neck tension, forced hand placements, breath-holding, hip neglect, and rushing, you’ll cultivate a safer, more effective Uttanasana. Remember: it’s not about how far you fold, but how mindfully and correctly you hinge. Embrace the journey of gradual opening, and let each breath guide you deeper into both your body and the present moment.Tools

ChatGPT can make mistakes. Check important info.

How Often Should Beginners Perform Flexibility Routines? A Complete Guide

Improving flexibility is a cornerstone of overall fitness, aiding posture, reducing injury risk, and enhancing performance in any discipline. But for beginners, the key question often is: how frequently should I stretch? Too little, and gains come slowly; too much, and you risk overstretching and injury. In this guide, we’ll explore evidence-based recommendations for flexibility routines, differentiate between types of stretching, outline how to structure your sessions, and provide a sample weekly plan to get you started safely and effectively.

Why Frequency Matters

Flexibility improvements hinge on consistent, progressive overload—similar to strength training. Regular stretching:

  • Promotes Tissue Adaptation: Repeated muscle-tendon lengthening signals your body to increase range of motion.
  • Enhances Neuromuscular Control: Frequent practice helps your nervous system override protective stretch reflexes.
  • Reduces Soreness and Tension: Gentle, regular stretches facilitate blood flow and assist recovery.

However, muscles and connective tissues need time to adapt. Overstretching without adequate recovery can lead to microtears, pain, and setbacks.

Types of Stretching and Recommended Cadence

Static Stretching

What it is: Holding a muscle at its end range for 15–60 seconds.
Frequency for Beginners:

  • 2–3 times per week on non-consecutive days for each major muscle group.
  • Sessions of 10–15 minutes after workouts or on active-recovery days.

Research shows that regular static stretching three times weekly can improve joint range by 5–20% over 6–8 weeks without negatively impacting strength or power when done post-exercise.

Dynamic Stretching

What it is: Controlled, movement-based stretches that take joints through their full range (leg swings, arm circles).
Frequency for Beginners:

  • Every workout session, as part of your warm-up.
  • 5–10 minutes before any exercise to prime muscles and improve functional mobility.

Dynamic routines prepare muscles for activity and can reduce injury risk when performed before training.

Proprioceptive Neuromuscular Facilitation (PNF)

What it is: Alternating contract–relax or hold–relax techniques with a partner or resistance.
Frequency for Beginners:

  • 1–2 times per week, ensuring at least 48 hours between sessions for the same muscle group.
  • Duration: 20–30 minutes per session focusing on specific tight areas.

PNF yields rapid gains in flexibility, but because of its intensity, less frequent practice reduces injury risk and ensures recovery.

Structuring Your Flexibility Routine

Warm-Up First

Always begin with 5–10 minutes of light cardio (e.g., brisk walking, stationary cycling) or dynamic stretches to raise muscle temperature and prevent strains.

Post-Workout Static Stretching

  • Target Major Muscle Groups: Hamstrings, quadriceps, hip flexors, calves, chest, shoulders, lower back.
  • Hold Times: Start with 15-second holds and gradually work up to 30–60 seconds as comfort increases.
  • Repetitions: 2–3 stretches per muscle group.

Dedicated Flexibility Sessions

On non-strength days or rest days, dedicate 20–30 minutes to a full-body flexibility routine, mixing static and PNF techniques for comprehensive gains.

Sample Weekly Flexibility Plan for Beginners

DayActivity
MondayDynamic warm-up + post-workout static stretching (15 min)
TuesdayActive rest + 20-min dedicated flexibility session (static & PNF)
WednesdayDynamic warm-up + post-workout static stretching (15 min)
ThursdayRest or light activity (e.g., walking, yoga flow)
FridayDynamic warm-up + post-workout static stretching (15 min)
SaturdayActive rest + 20-min dedicated flexibility session
SundayRest or gentle mobility (foam rolling, light yoga)

This schedule balances training days with focused flexibility work and recovery, allowing tissues to adapt effectively.

Tips for Safe, Effective Progress

  1. Listen to Your Body: Stretch to a point of mild discomfort, never sharp pain.
  2. Progress Gradually: Increase hold times and range incrementally—aim for 5% improvements per week.
  3. Breathe Deeply: Steady exhalations help muscles relax and deepen the stretch.
  4. Stay Consistent: Flexibility gains compound over time; missing sessions slows progress.
  5. Hydrate and Fuel Properly: Well-hydrated muscles and balanced nutrition support tissue health and recovery.

When to Seek Professional Guidance

  • Persistent Tightness: If certain areas remain stubbornly inflexible after 4–6 weeks.
  • Pain During Stretching: Sharp or joint pain warrants evaluation by a physical therapist.
  • Pre-Existing Injuries: Customized programs reduce risk and ensure safe progression.

Conclusion

For beginners, a well-rounded flexibility routine performed 2–3 times per week for static stretches, each training session for dynamic warm-ups, and 1–2 times per week for PNF represents an optimal balance of stimulus and recovery. By structuring your plan to include post-workout stretches, dedicated flexibility sessions, and ample rest, you’ll build safe, sustainable gains in range of motion—paving the way for better performance, reduced injury risk, and greater overall mobility.

Proprioceptive Neuromuscular Facilitation (PNF) Stretching: The Ultimate Guide to Faster, Lasting Flexibility Gains

Stretching is more than a warm-up ritual; it’s a pathway to improved performance, injury prevention, and enhanced quality of life. Yet, traditional static stretches can plateau, leaving athletes and fitness enthusiasts frustrated by slow progress. Enter Proprioceptive Neuromuscular Facilitation (PNF)—an advanced flexibility method originally developed in the 1940s for rehabilitation, now embraced by elite athletes, physical therapists, and movement coaches worldwide. By harnessing your body’s own neuromuscular reflexes, PNF delivers deeper, more enduring range-of-motion gains than static or dynamic stretching alone.

In this comprehensive guide, you’ll discover:

  • The science of how PNF engages muscle spindles and Golgi tendon organs
  • Three core PNF techniques and when to use each
  • Step-by-step protocols for safe, effective sessions
  • Real-world examples—from dancers achieving full splits to desk workers reversing hip flexor tightness
  • Best practices, common pitfalls, and how to integrate PNF into your warm-up or cool-down

Whether you’re chasing new personal records, rehabbing an injury, or simply seeking greater mobility in your daily life, this deep dive will equip you to stretch smarter—and see results faster.

The Science Behind PNF: Tapping Your Body’s Built-In Flexibility Switch

Your muscles and tendons host two sensory structures critical to PNF’s success:

  1. Muscle Spindles detect changes in muscle length and rate of stretch. When they sense a rapid or excessive stretch, they trigger a stretch reflex, causing the muscle to contract and protect itself from damage.
  2. Golgi Tendon Organs (GTOs) monitor tension at the muscle-tendon junction. As tension rises—especially during an isometric contraction—GTOs respond by initiating an autogenic inhibition reflex, signaling the muscle to relax, which allows a deeper subsequent stretch.

PNF leverages this autogenic inhibition: by contracting the muscle against resistance (raising tension), then relaxing, you “turn off” the protective spindle reflex and enjoy a greater stretch than passive methods permit.

Expert Insight: Research shows PNF stretching can increase passive range of motion by up to 40% more than static stretching alone, thanks to enhanced neuromuscular coordination and temporary reductions in muscle tone.

Three Core PNF Techniques

While numerous PNF variations exist, three protocols dominate both clinical and athletic settings:

1. Hold–Relax

  1. Passive Pre-Stretch (10–15 s): Move the target muscle to the first point of mild discomfort.
  2. Isometric Contraction (6–10 s): Against a partner’s resistance (or fixed object), push the limb without changing joint angle.
  3. Relax & Breathe (2–3 s): Release the contraction fully.
  4. Deeper Passive Stretch (15–30 s): Gently move further into the range of motion.
  5. Repeat (2–4 cycles): Enhance gains with each iteration.

Use hold–relax when you need controlled, focused lengthening—ideal for rehabilitating after injury or when muscle soreness is a concern.

2. Contract–Relax

  1. Passive Pre-Stretch (10–15 s)
  2. Isotonic Contraction (6–10 s): Actively move the limb through its range, pushing against resistance.
  3. Relax & Breathe (2–3 s)
  4. Deepened Passive Stretch (15–30 s)
  5. Repeat (2–4 cycles)

Contract–relax engages the full lengthening and shortening cycle, making it excellent for athletes seeking both flexibility and dynamic control—such as martial artists or dancers.

3. Hold–Relax with Agonist Contraction

Combining the hold–relax of the target muscle with an active contraction of its antagonist (opposing muscle) yields the most pronounced gains:

  1. Passive Pre-Stretch (10–15 s)
  2. Isometric Contraction of Target (6–10 s)
  3. Agonist (Opposing) Active Contraction: Immediately, contract the muscle opposite to the one you’re stretching, “pulling” the limb further.
  4. Deeper Passive Stretch (15–30 s)
  5. Repeat (2–4 cycles)

This technique exploits both autogenic and reciprocal inhibition: the target muscle relaxes via GTOs, while the antagonist’s contraction further suppresses the target’s tone through spinal reflexes.

When to Use PNF: Timing and Context

As a Cool-Down for Maximal Gains

  • After Intense Training or Rehabilitation: Muscles are warm, pliable, and ready for deeper stretching.
  • Goal: Increase long-term flexibility and reset muscle resting length.

In a Dynamic Warm-Up (Selective Use)

  • Use Low-Intensity Agonist Contractions (e.g., gentle active leg swings) rather than long holds to awaken neuromuscular pathways without inducing post-stretch strength loss.
  • Goal: Prime your nervous system for explosive movement, not to build maximal flexibility in the moment.

In Rehabilitation Settings

  • Post-Injury Mobility Restoration: Once acute inflammation subsides, PNF expedites return of joint motion—crucial after ACL surgery or hamstring strains.
  • Chronic Tightness Resolution: Addresses fascial restrictions and hypertonic muscles (e.g., chronically tight hip flexors in desk workers).

Programming Your PNF Sessions

Frequency and Volume

  • Beginners: 1–2 sessions per week per muscle group, 2–3 cycles of 10–15 s holds.
  • Advanced: Up to 3–4 sessions per week for targeted improvements, monitoring muscle soreness and recovery.
  • Rest Between Cycles: 30 s–1 min to allow neuromuscular reset.

Sample Routine for Hamstring Flexibility

  1. Light Cardio Warm-Up (5 min): Stationary bike or brisk walk.
  2. Dynamic Leg Swings (10 reps/leg): Front-to-back at hip height.
  3. PNF Hold–Relax (Hamstrings):
    • Partner lifts the straight leg to mild stretch
    • Push heel into partner’s hand (6 s)
    • Relax; partner lifts further (20 s)
    • Repeat 3 times
  4. Static Hold (Quad, Hip Flexor): 30 s each side
  5. Foam Rolling (2 min): Full legs

Total time: ~20 minutes.

Real-World Success Stories

  • Ballet Dancers: A professional company incorporated hold–relax with agonist contraction into weekly routines and saw average split progress of 20° over six weeks.
  • High School Track Athletes: Sprinters added contract–relax drills for hip flexors and increased stride length by 5 cm, shaving 0.1 s off their 100 m times.

Case Study: A collegiate soccer player with chronic hamstring tightness reduced injury recurrence by 60% after 8 weeks of twice-weekly PNF sessions, compared to teammates using only static stretching.

Common Pitfalls and How to Avoid Them

  • Skipping the Warm-Up: Attempting deep PNF on cold muscles increases risk of strain. Always start with 5–10 minutes of light activity.
  • Overstretching Beyond Sensation of Mild Discomfort: Sharp pain signals tissue damage. Back off to the first point of tension.
  • Relying Solely on PNF: For balanced mobility, complement PNF with dynamic mobility drills, strength training through range of motion, and myofascial release.
  • Neglecting Recovery: Excessive frequency without adequate rest can lead to neural fatigue and diminished returns.

Expert Tips for Maximum Effectiveness

  • Breathe Fully: Inhale before the contraction; exhale during the passive stretch to encourage relaxation.
  • Visualize the Target Muscle Relaxing: Mental imagery enhances the GTO response and deepens stretch.
  • Use Bands or Straps: For solo PNF, resistance bands allow you to create partner-like tension safely.
  • Track Your Progress: Record joint angles with a goniometer or mobile app to quantify flexibility gains over time.

Integrating PNF into Your Long-Term Mobility Strategy

  1. Assess Your Baseline: Perform simple measures—sit-and-reach test, shoulder flexion range—to gauge current flexibility.
  2. Set SMART Flexibility Goals:
    • Specific: “Increase hamstring passive straight-leg raise from 70° to 90°.”
    • Measurable: Use a goniometer or video analysis.
    • Achievable: Based on current baseline and time commitment.
    • Relevant: Improves deadlift form and reduces low-back strain.
    • Time-bound: Achieve within 8 weeks.
  3. Design a Balanced Program: Combine PNF with static holds, dynamic movements, and strengthening through new ranges (e.g., Romanian deadlifts for hamstrings).
  4. Monitor and Adjust: Re-test range every two weeks; dial back or intensify PNF based on progress and soreness.
  5. Maintain Gains: Once goals are met, reduce PNF frequency to 1× per week and use active mobility drills daily.

Conclusion

Proprioceptive Neuromuscular Facilitation stretching harnesses your body’s innate neuromuscular reflexes to achieve faster, more durable increases in flexibility than static or dynamic stretching alone. By strategically combining isometric or isotonic contractions with passive lengthening—and layering in agonist contractions—you unlock deeper range of motion, support injury rehabilitation, and elevate athletic performance. Remember to warm up thoroughly, respect your discomfort threshold, and integrate PNF as part of a holistic mobility and strength program. With consistency and smart programming, PNF will become your go-to tool for breaking through flexibility plateaus and moving with greater ease and confidence every day.